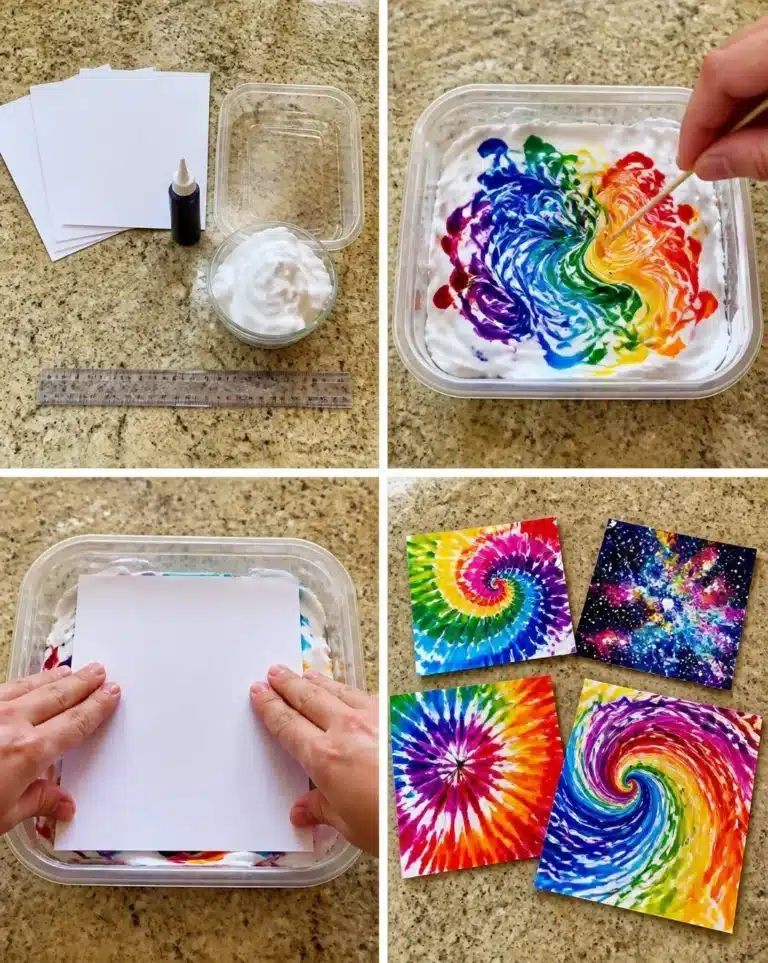
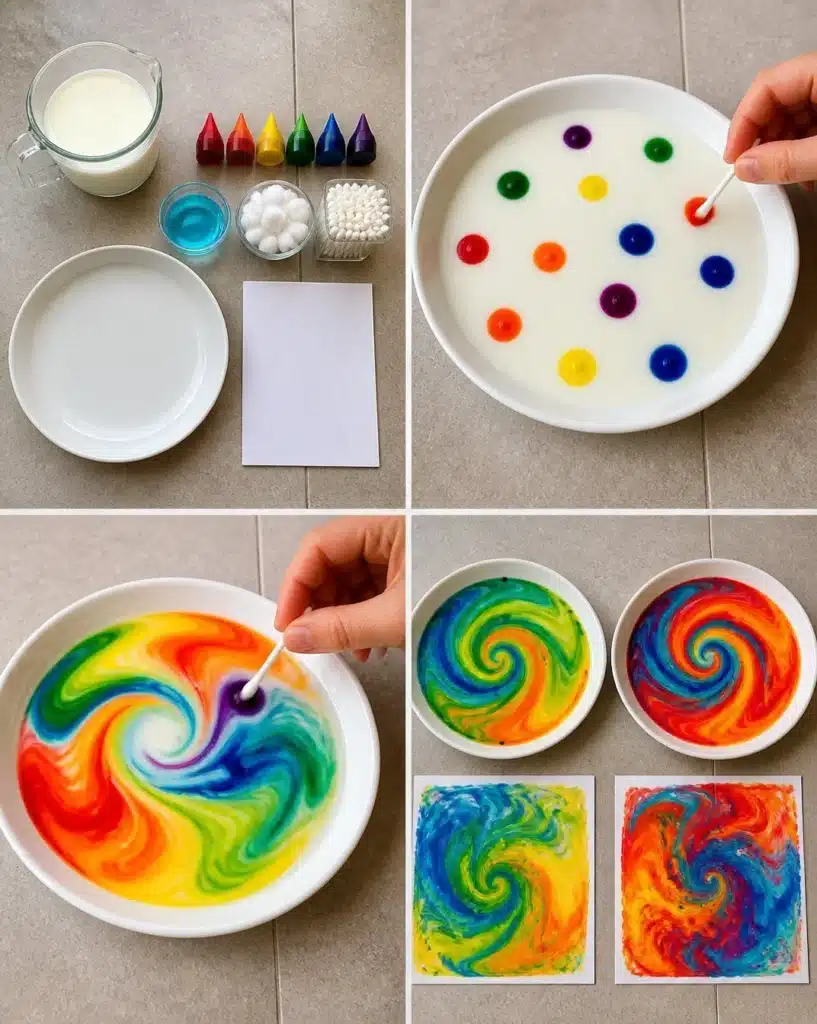
Rainbow Milk Swirl Art is a delightful and visually stunning project that is sure to captivate anyone who tries it. It transforms simple ingredients into a beautiful work of art that is perfect for children and adults alike. This hands-on activity allows for creativity and personalization, making it an engaging experience during family gatherings, classroom activities, or rainy afternoons at home. Once completed, the artwork can be displayed on a wall, used as a colorful centerpiece, or gifted to a loved one. You may also find Best 16 Breakfast Bowl Recipes Kickstart Your Day useful.
Why You’ll Want to Make Rainbow Milk Swirl Art
This project is more than just a fun craft; it offers a multitude of benefits that make it worth your time. First, the materials are easy to find and often already in your kitchen Milk, food coloring, dish soap, and paper are all commonplace. Next, the steps are beginner-friendly and do not require any advanced skills. This means that even young crafters can participate while learning about color mixing and the science behind the reactions of the materials. You may also find Blueberry Swirl Yogurt Bites useful.
Moreover, Rainbow Milk Swirl Art is highly decorative, bringing a pop of color into any space. It’s perfect for brightening up a dull room or adding a personal touch to a gift. The variations you can create with different colors and patterns make this craft endlessly customizable, allowing you to experiment with your favorite shades and designs. For those who enjoy handmade gifts, this project serves as a heartfelt option that anyone would appreciate. You may also find Brownie Pudding Inspired By Ina Garten useful.
Before You Start
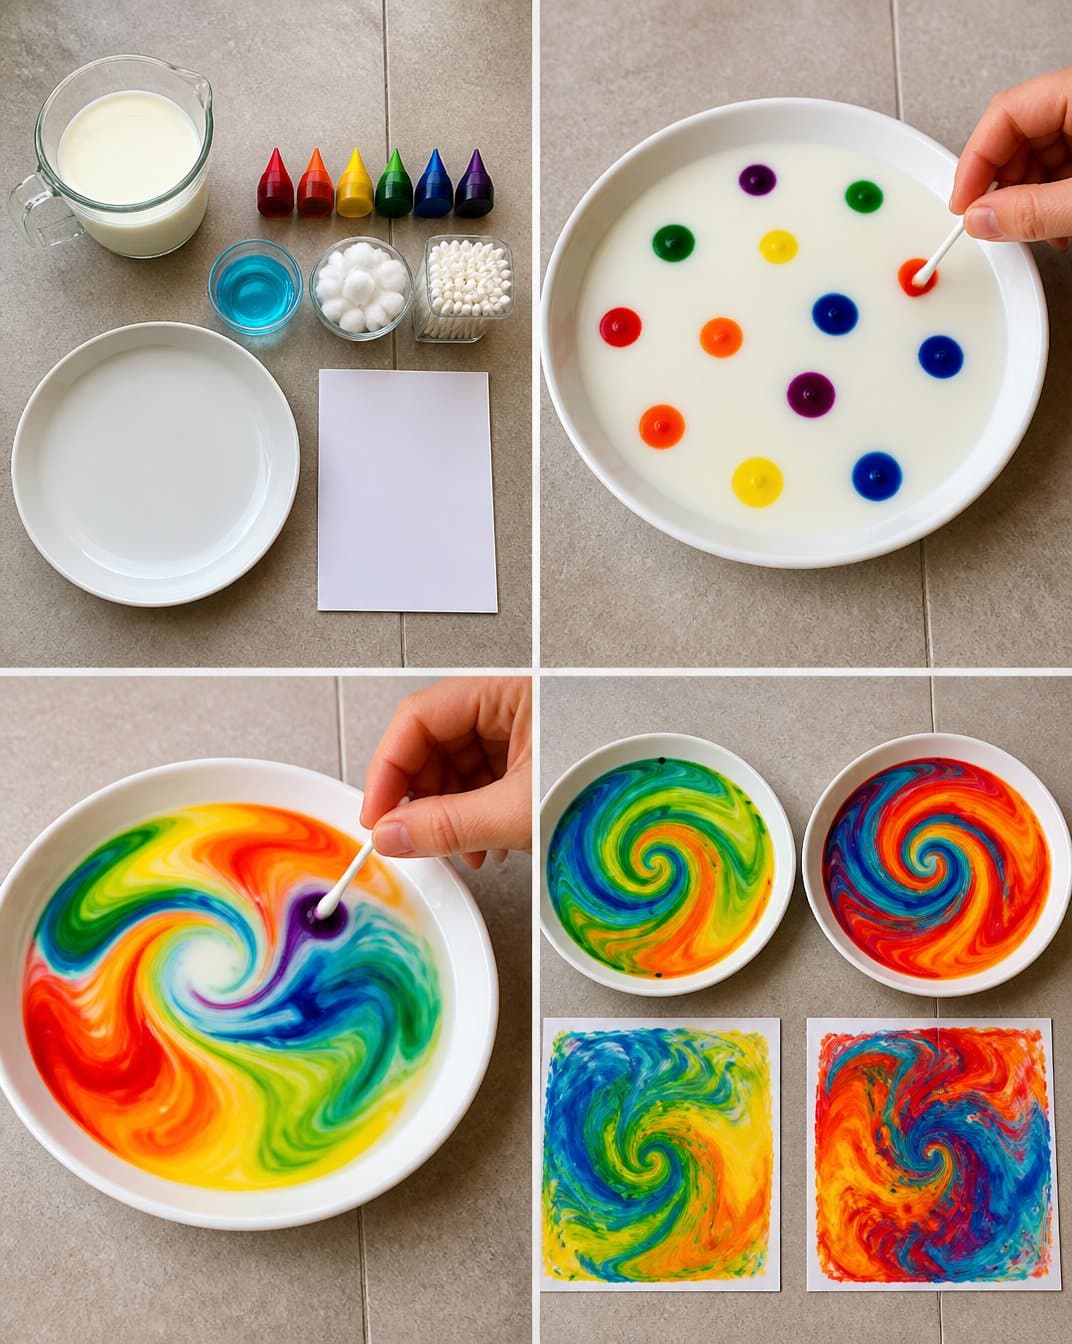
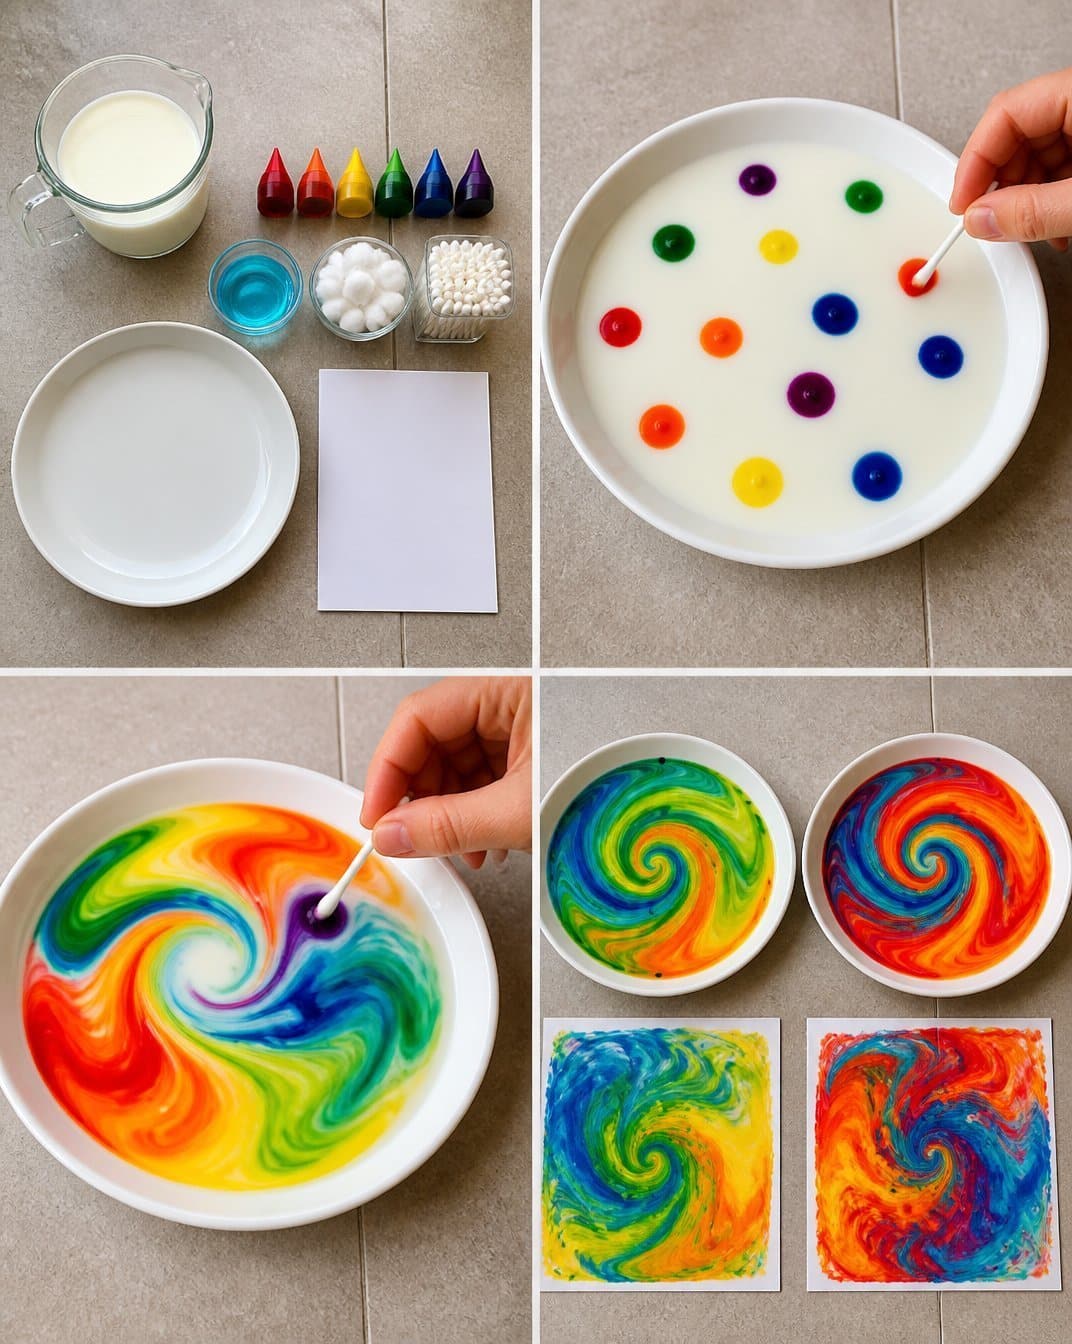
Before diving into this vibrant project, it’s important to have a clear understanding of what you’ll be doing. The process involves pouring milk into a dish, adding drops of food coloring, and creating an explosion of colors by introducing dish soap. The result is swirling patterns that look exquisite when printed onto paper. Expect the finished artwork to be rich in color and eye-catching, with various swirling designs based on how you combine your colors and how much soap you use.
Additionally, make sure you have your workspace protected, as food coloring can stain surfaces and fabrics. Working on a kitchen counter covered with newspaper or an old tablecloth can help mitigate messes. It’s also vital to supervise kids during the process, especially when using dish soap to ensure safety and proper technique.
Materials You’ll Need
- Whole milk (or any milk of your choice)
- Food coloring (liquid or gel)
- Dish soap
- Cotton balls or Q-tips
- A shallow dish or pie plate
- Paper (for printing)
Helpful Tools
While the primary materials listed above are essential, having extra tools like scissors and a paper towel handy can assist with cleanup and any adjustments during the craft.
How to Make Rainbow Milk Swirl Art
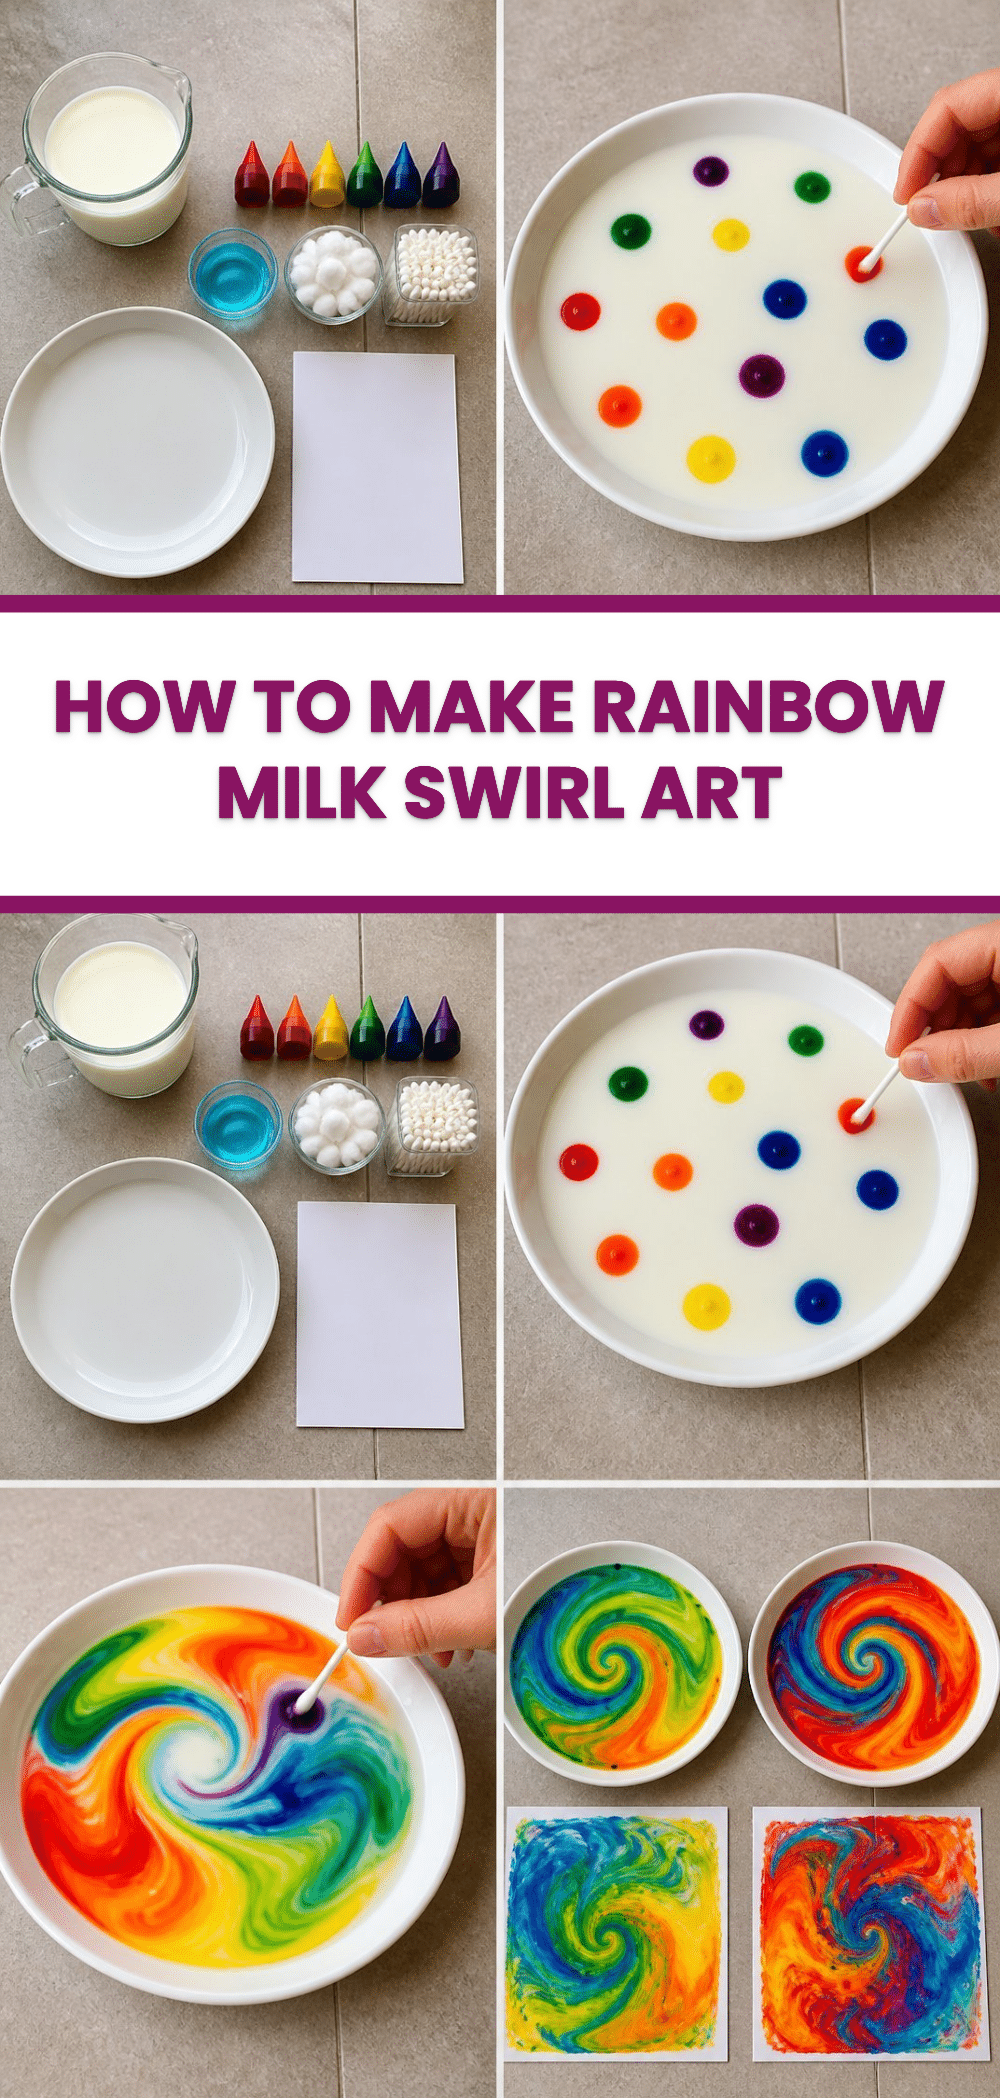
- Pour enough milk into your shallow dish to cover the bottom nicely. Be careful not to spill; we want to keep things cozy and calm!
- Next, add several drops of your favorite food coloring right in the center of the milk. You can let your child pick the colors for extra fun!
- Have an adult dip the cotton swab into the dish soap and gently touch it to the center of the milk surface. Watch the colors dance and swirl it’s a little magic show!
- Now, carefully lay a piece of paper on top of those beautiful, swirling colors to transfer the design.
- Lift the paper slowly to reveal your masterpiece, and set it aside to dry completely.
How to Display Rainbow Milk Swirl Art
Once your artwork has dried, there are various ways to showcase it. You can frame it and hang it on a wall as part of a gallery display, or even use it as a colorful background for a notebook cover. This craft also works well as seasonal decoration imagine using specific colors for holidays or different events! For families, it can add a personal touch to a shared family space or each child can create their own unique piece to represent their personality.
Tips for the Best Result
- Use a steady hand when adding food coloring to prevent muddled colors.
- Experiment with multiple colors in different spots to create unique designs.
- Use less dish soap for more subtle swirls; more soap will create stronger, more explosive color reactions.
- Allow the paper to dry completely before displaying or storing it to prevent smudging.
Common Mistakes and Easy Fixes
Bleeding Colors: If your colors end up mixing too much, it might be due to adding too much food coloring at once. Next time, try adding fewer drops and allow each color time to settle before introducing more.
Weak Swirls: If the patterns are not as vibrant as you hoped, check the amount of dish soap you are using. A small but concentrated application works best for lively swirls.
Messy Workspace: If you find the mess overwhelming, consider using a tray to keep everything contained. Shallow trays help in limiting spills while keeping the crafting area manageable.
Creative Variations
Feel free to personalize this craft further by trying out different techniques and materials. You could:
- Use different bases like almond milk or soy milk for varied texture.
- Experiment with glitter for added sparkle after your art dries.
- Create thematic color combinations for specific holidays such as reds and greens for Christmas or pastels for Easter.
- Add initials or names on the paper before making the swirls to create personalized gifts.
How to Store Rainbow Milk Swirl Art
To keep your artwork looking beautiful, store it in a cool and dry place away from direct sunlight to prevent fading. If you plan to display it, consider putting it in a glass frame to protect the colors while still enjoying the view. If your crafts are temporary, simply enjoy them for a while and then recycle the paper when it starts to fade.
A Quick Safety Note
Though the materials used are generally safe, ensure that younger children are supervised during the crafting process, especially when using dish soap and handling any colored materials to avoid unintentional messes or stains.
FAQs About Rainbow Milk Swirl Art
How long does it take for the art to dry?
It usually takes about an hour for the paper to dry completely.
Can I use different colors?
Absolutely! Feel free to mix and match any colors you prefer.
What happens if I use too much dish soap?
Using too much can overpower the color reactions, making them less distinct.
Can I make this in advance?
Yes, but it’s best to make the project shortly before you want to display it for freshness.
Will this project stain?
Food coloring may stain surfaces or fabrics, so take precautions with your workspace.
Conclusion
Rainbow Milk Swirl Art not only allows for creativity and fun but also teaches a little bit of science with the way colors and soap interact. It’s a project that anyone can enjoy, whether working alone or with family. If you’re looking for more colorful craft ideas, you might enjoy Rainbow Milk Art: Kitchen Fun Part 5 – Popsicle Blog or How to Make Rainbow Milk Marbled Paper Art | Vibrant DIY Craft. Dive into this colorful endeavor and let your imagination run wild!
Follow us on social for more recipe ideas & inspiration!
Rainbow Milk Swirl Art
Would you like to save this recipe?
By submitting you agree to receive this recipe and occasional emails. Unsubscribe anytime.
Ingredients
For the Rainbow Milk Swirl Art
- 1 cup Whole milk (or any milk of your choice)
- a few drops Food coloring (liquid or gel) Use various colors
- 1 tablespoon Dish soap For creating the swirls
- 1 unit Cotton balls or Q-tips For applying dish soap
- 1 piece Paper (for printing) Used to capture the swirls
- 1 unit Shallow dish or pie plate To hold the milk and colors
Helpful Tools
- 1 pair Scissors For cleanup and adjustments
- 1 unit Paper towel For cleanup
Instructions
Preparation
- Pour enough milk into your shallow dish to cover the bottom nicely.
- Add several drops of your favorite food coloring right in the center of the milk.
Creating Swirls
- Have an adult dip the cotton swab into the dish soap and gently touch it to the center of the milk surface.
- Watch the colors dance and swirl.
Capturing Art
- Carefully lay a piece of paper on top of the swirling colors to transfer the design.
- Lift the paper slowly to reveal your masterpiece and set it aside to dry completely.
Last Step: Don’t forget to leave a rating and comment below! It helps other readers find the best recipes — and it helps us too!
Tips & Notes:
Nutrition Information: Serving: 1 | Calories: | Carbohydrates: | Protein: | Fat: | Sodium: | Fiber: | Sugar:
Nutritional information is provided as a courtesy and calculated automatically. Values can vary depending on the brands and ingredients you use, so if you’re tracking closely, I recommend calculating with your own preferred tool.