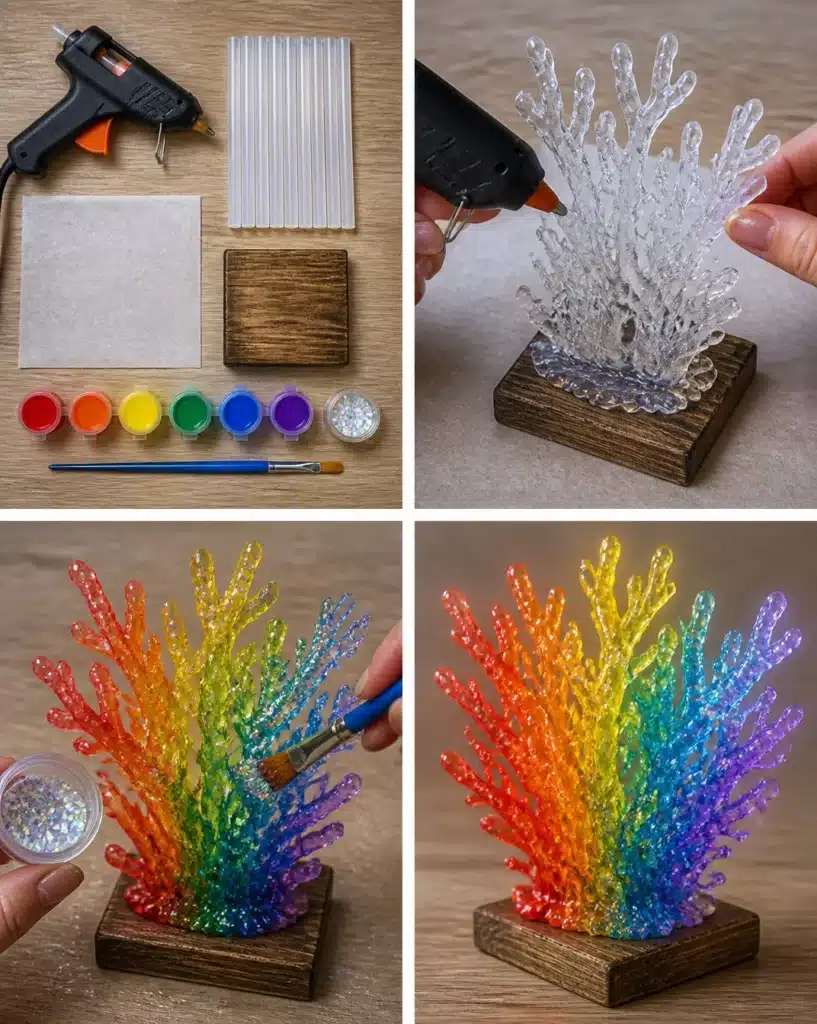
Why Magic Rainbow Coral Sculpture Is Worth Making
Crafting a Magic Rainbow Coral Sculpture is an exciting project that allows you to explore your creativity. The vibrant combination of colors and organic shapes creates a stunning piece of art that’s perfect for displaying in your home or gifting to a friend. You’ll find that the materials are easy to find, and the steps are beginner-friendly, making this project accessible to all skill levels. Imagine how delightful it will be to showcase your handmade coral sculpture on a shelf, adding a splash of color and charm to any room. You may also find Magical Butterbeer Floats useful.
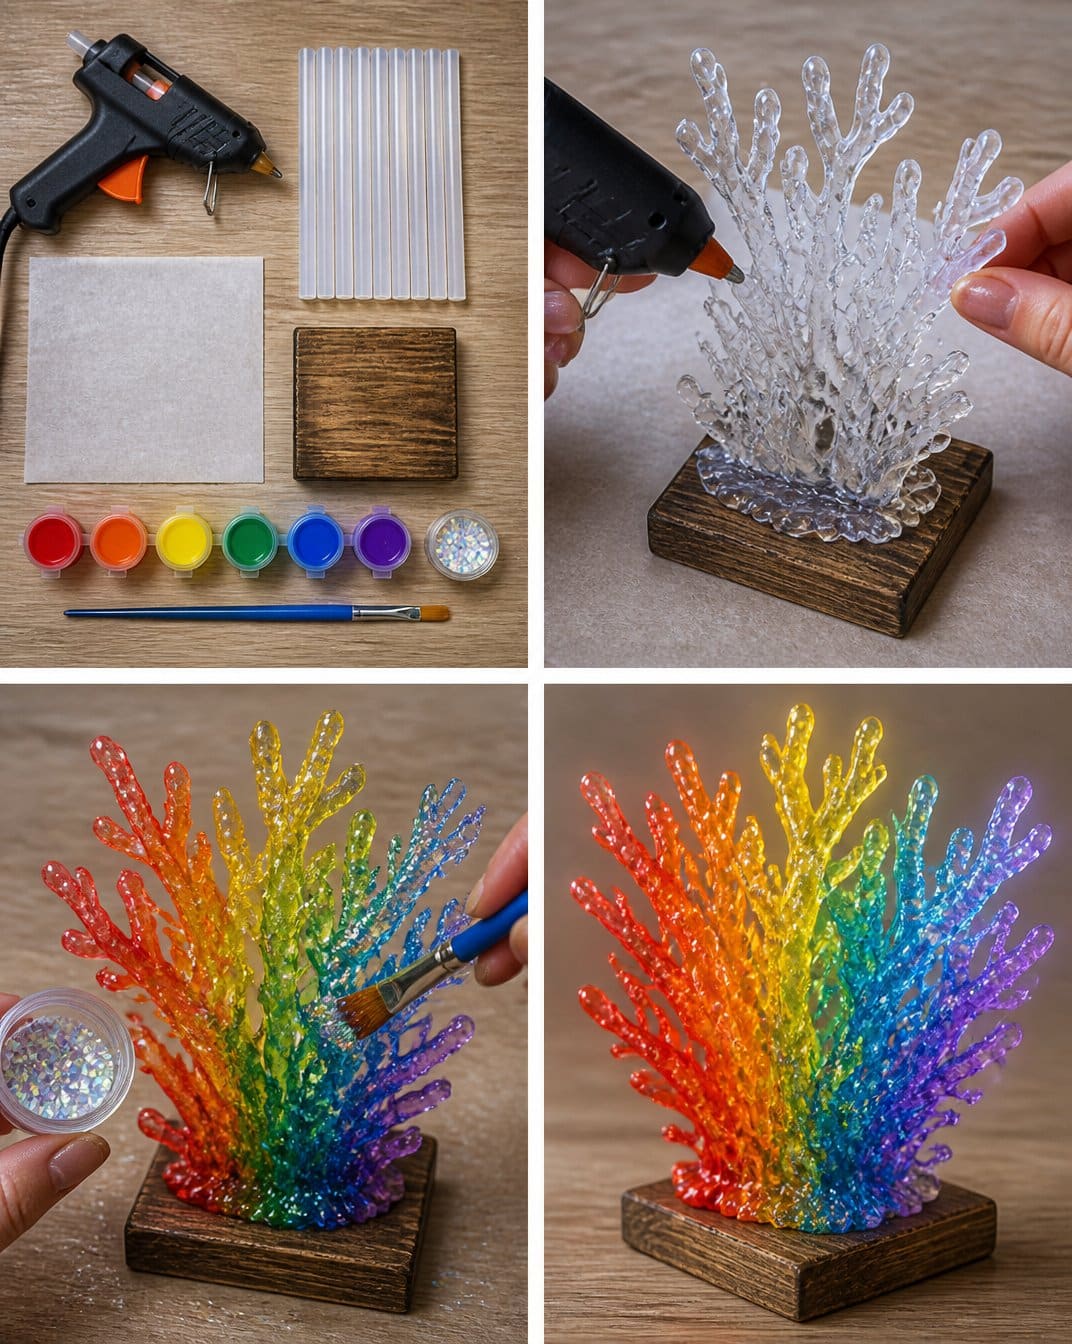
Getting Ready to Make Magic Rainbow Coral Sculpture
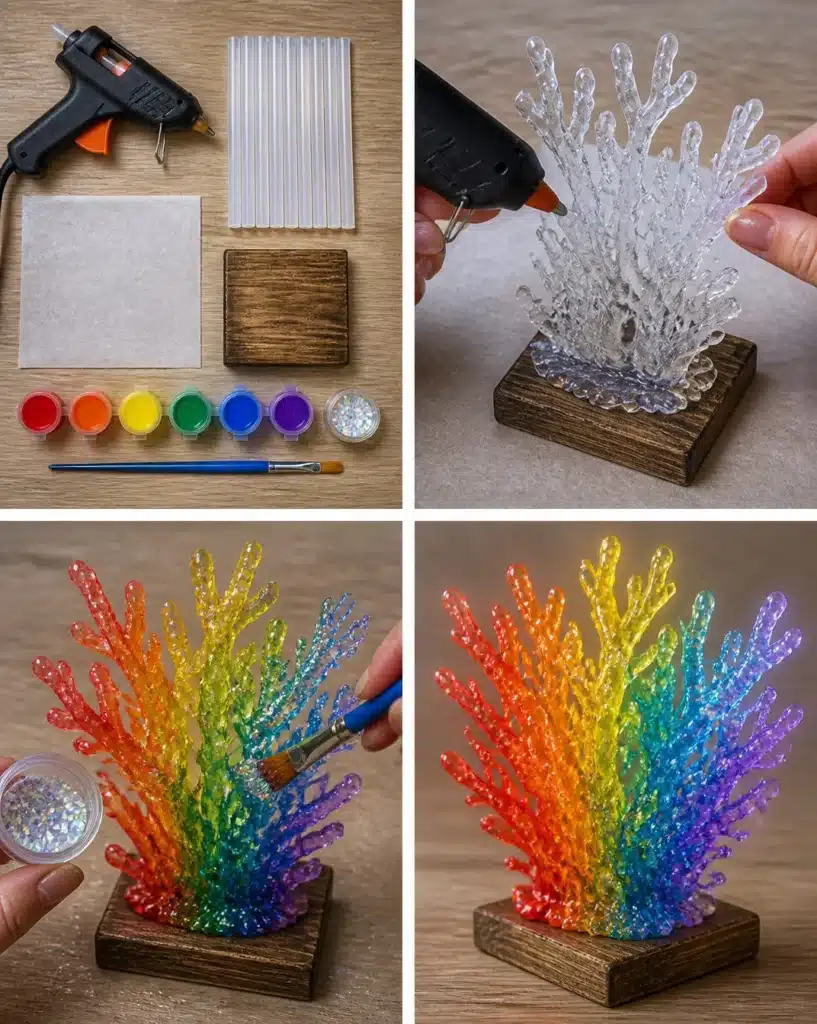
Before you dive into making your Magic Rainbow Coral Sculpture, it’s good to have an overview of the project. You will be layering hot glue to create intricate coral shapes, painting them in a beautiful gradient of colors, and adding a touch of sparkle with iridescent glitter. The final piece will resemble a magical underwater scene, filled with color and light-catching details. You may also find Simple Color Changing Magic Lemonade useful.
Setting up your workspace is crucial; make sure to protect your surface with a drop cloth or newspaper, as hot glue can be messy. If you’re a beginner or working with children, having an adult supervise the use of the hot glue gun is advisable, as the tip can get very hot. You may also find Sweet Sour Vodka Rainbow Rollups useful.
Materials You’ll Need
Here’s what you’ll need to create your Magic Rainbow Coral Sculpture:
- 1 high-temperature hot glue gun
- 12 clear hot glue sticks
- 1 small rustic wooden base (4 inches by 4 inches)
- 1 sheet of parchment paper (12 inches by 12 inches)
- 0.5 oz acrylic paint in red, orange, yellow, green, blue, and violet
- 1 tbsp fine iridescent craft glitter
- 1 small soft-bristle craft paintbrush
Helpful Tools
While the hot glue gun is the primary tool for this project, a pair of scissors might also be handy to trim any wandering glue strands if necessary.
How to Make Magic Rainbow Coral Sculpture
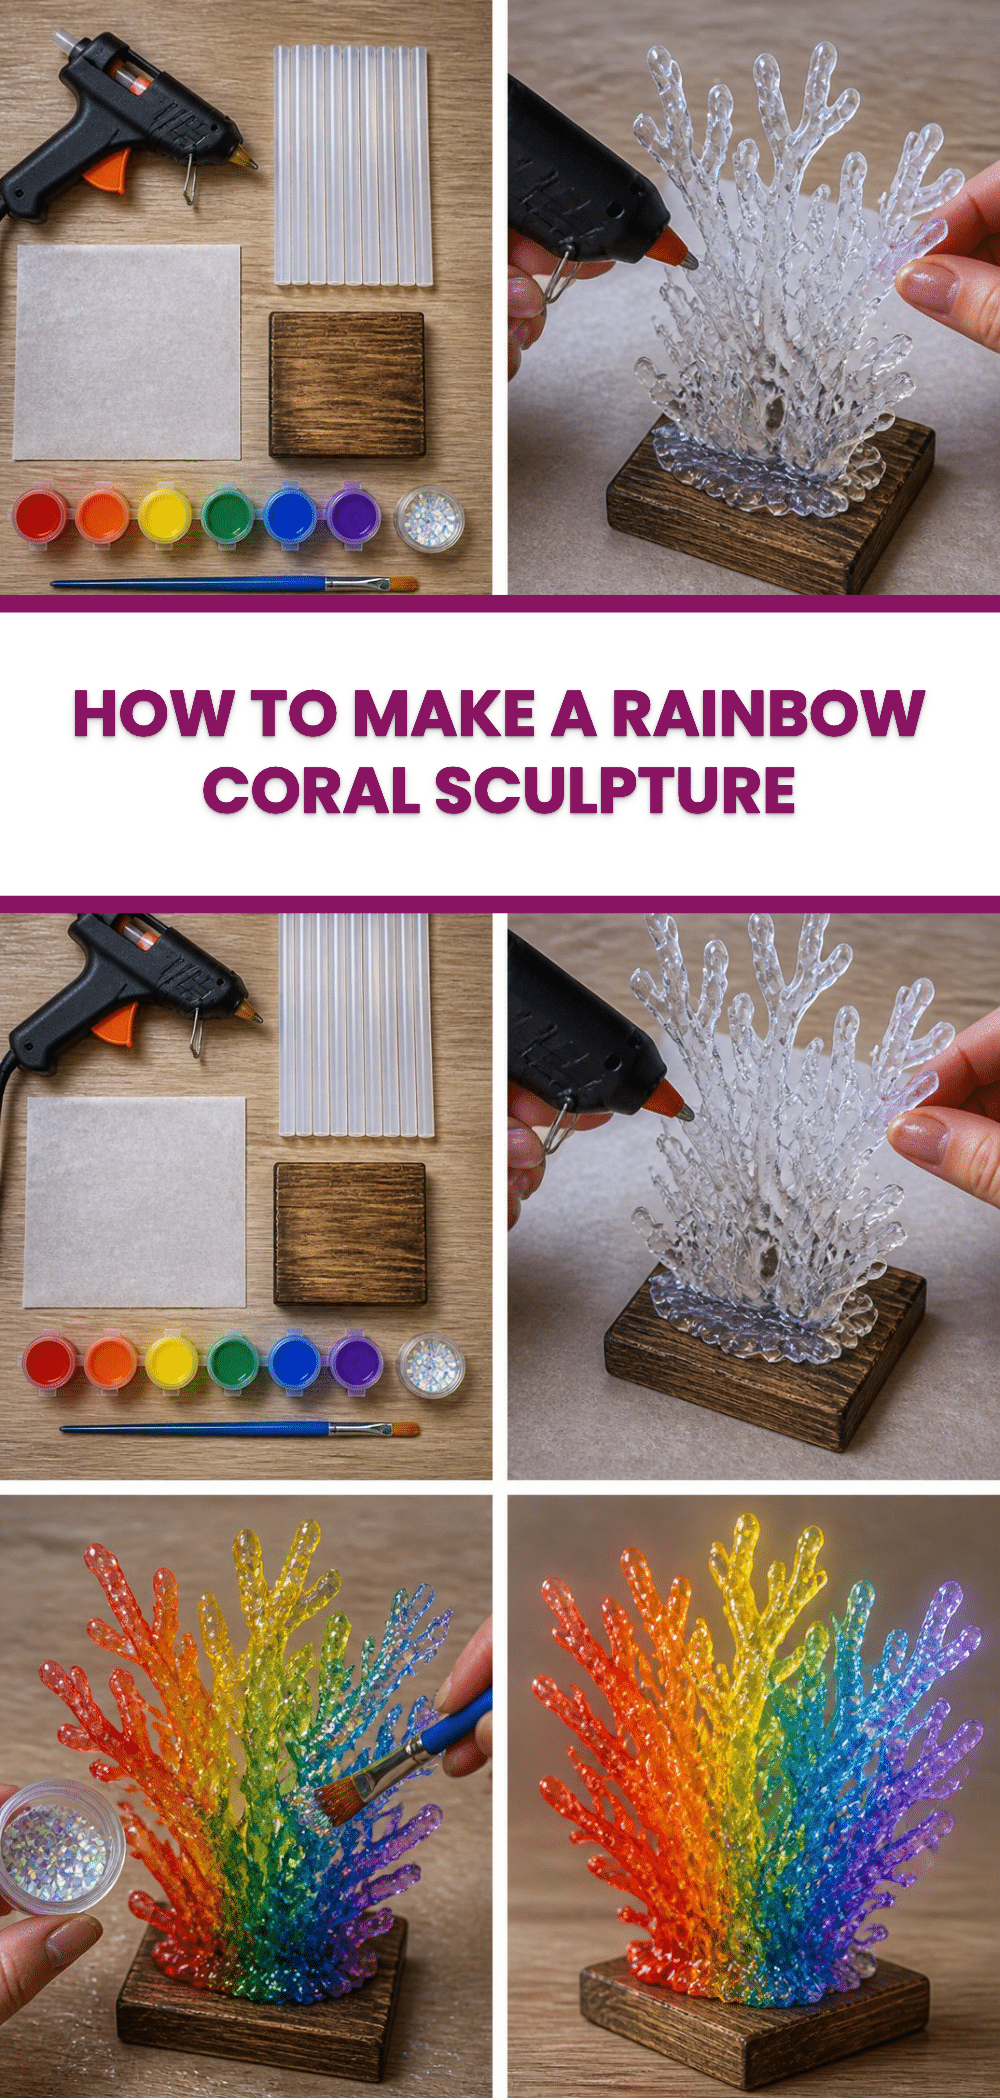
Begin by laying the parchment paper flat on your work surface. This will be the surface on which you create the coral shapes.
Using the hot glue gun, carefully trace and layer organic coral shapes on the parchment paper. Start with thin layers, allowing each section to cool completely before adding more. This process helps maintain the sculpture’s stability and prevents sagging.
Once you have layered enough glue to create a thick coral shape, gently peel off the hardened shape from the parchment. You may need to wiggle it a bit to detach it.
Secure the coral shape upright on the rustic wooden base using extra hot glue. If necessary, hold it in place for a few seconds while the glue cools to ensure it adheres well.
Take the soft-bristle paintbrush and create a stunning rainbow gradient by applying the acrylic paint. Start with one color at the base and slowly blend into the next. This part is quite fun, as you can freely mix the colors where they meet to achieve a seamless transition.
While the paint is still wet, sprinkle the iridescent glitter over the sculpture. This detail mimics the mesmerizing sparkle of underwater light, bringing your coral to life.
Let your sculpture dry fully before showcasing it in your desired spot. This drying time is important to ensure that everything sets well and holds together.
How to Display Magic Rainbow Coral Sculpture
Once your Magic Rainbow Coral Sculpture is complete, consider the best way to show it off. This vibrant piece can serve as a captivating centerpiece on your coffee table or can be placed on a shelf to brighten up your living space. For an extra touch, consider arranging it with other ocean-themed decorations. A small arrangement of seashells or decorative fish can beautifully complement your coral sculpture, creating an enchanting underwater scene.
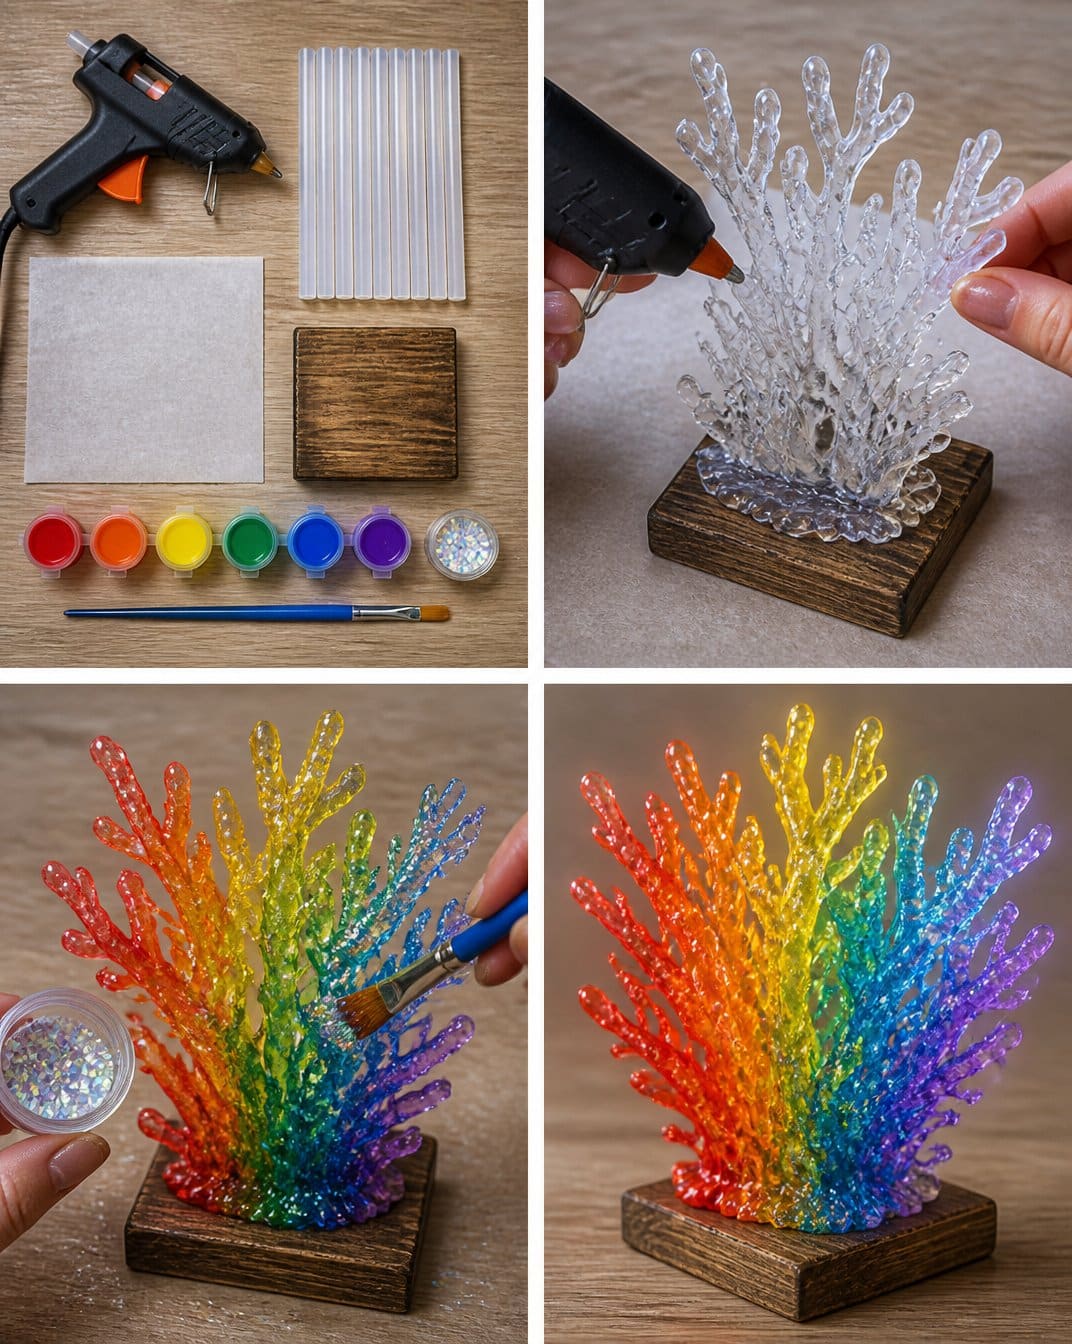
Tips for the Best Result
To achieve the best result with your Magic Rainbow Coral Sculpture, keep these tips in mind:
- Take your time layering the glue. Thin layers will adhere better and create a more delicate appearance.
- Make sure to let each layer of paint dry before applying another color to prevent mixing.
- When applying glitter, do it over a tray or a newspaper to catch excess and reuse it later.
- For cleaner edges in your coral shapes, consider using a small craft knife to trim any rough spots after the glue has cooled.
- Protect your workspace to make cleanup easier and to avoid damaging your table or floor.
Common Mistakes and Easy Fixes
While working on your sculpture, you may encounter some common issues. Here’s what to watch for and how to fix them:
Problem: The glue is too thick, causing a lumpy appearance. Cause: Adding too much glue at once without letting it cool. Fix: Create thinner layers next time and let each layer cool slightly before adding more.
Problem: The coral pieces are not sticking properly to the base. Cause: Insufficient glue application. Fix: Ensure you apply enough hot glue to secure the piece, and hold it firmly until the glue sets.
Problem: Colors are bleeding into one another. Cause: Not allowing the paint to dry fully before continuing. Fix: Let each layer dry completely before applying the next color.
Creative Ways to Make It Your Own
There are many ways to personalize your Magic Rainbow Coral Sculpture. Here are some ideas:
- Experiment with colors: Use your favorite hues or match the colors to a room’s décor for a cohesive look.
- Add natural embellishments: Incorporate small seashells or tiny faux sea creatures around the base for added detail.
- Change the shape: Vary the design of your coral by creating taller or more intricate shapes based on inspiration from real coral reefs.
- Seasonal themes: Consider seasonal decorations by altering the colors for specific holidays or events.
How to Store Magic Rainbow Coral Sculpture
Caring for your Magic Rainbow Coral Sculpture is relatively simple. Dust it regularly to maintain its vibrant colors. Avoid exposing it to moisture and direct sunlight to prevent any potential fading of the paint. If displayed outdoors, bring the sculpture inside during extreme weather to protect it from the elements.
A Quick Safety Note
When using a hot glue gun, be mindful of the hot tip and melted glue. Adult supervision is recommended for children working with the glue gun, as it can cause burns.
FAQs About Magic Rainbow Coral Sculpture
How long does it take to make?
Creating the Magic Rainbow Coral Sculpture generally takes about 2-3 hours, including drying time.
Can I use a different type of glue?
While a high-temperature hot glue gun works best for this project, you may try an all-purpose adhesive, but it might require longer drying times and may not hold as securely.
What if I run out of paint?
You can easily mix additional paint or utilize any leftover acrylics you have at home to match the colors used.
Why is my project not holding together?
This could be due to insufficient glue application. Make sure to secure each piece firmly with enough glue and allow it to set before moving it.
Conclusion
In conclusion, the Magic Rainbow Coral Sculpture project offers a wonderful combination of creativity and fun. It’s a perfect way to explore color and shape while creating a unique decorative piece. For more artistic inspiration, consider exploring the Coral Reef Collection – Gold-Plated Elegance at Lladró or check out how Photographer Leanne Dunic Wants to Misdirect Your Eye for innovative ideas that may inspire your next project! Happy crafting!
Follow us on social for more recipe ideas & inspiration!
Magic Rainbow Coral Sculpture
Would you like to save this recipe?
By submitting you agree to receive this recipe and occasional emails. Unsubscribe anytime.
Ingredients
Materials needed
- 1 each high-temperature hot glue gun Primary tool for the project.
- 12 sticks clear hot glue sticks Required for creating the coral shapes.
- 1 each small rustic wooden base (4 inches by 4 inches) To secure the coral sculpture.
- 1 sheet parchment paper (12 inches by 12 inches) Surface for creating coral shapes.
- 0.5 oz acrylic paint in red, orange, yellow, green, blue, and violet Used for coloring the sculpture.
- 1 tbsp fine iridescent craft glitter For adding sparkle to the coral.
- 1 each small soft-bristle craft paintbrush For applying paint.
Instructions
Preparation
- Lay the parchment paper flat on your work surface.
- Using the hot glue gun, carefully trace and layer organic coral shapes on the parchment paper.
- Allow each section to cool completely before adding more glue.
- Peel off the hardened coral shape from the parchment paper.
- Secure the coral shape upright on the rustic wooden base using hot glue.
- Use the soft-bristle paintbrush to create a rainbow gradient with the acrylic paint.
- While the paint is still wet, sprinkle the iridescent glitter over the sculpture.
- Let the sculpture dry fully before displaying.
Last Step: Don’t forget to leave a rating and comment below! It helps other readers find the best recipes — and it helps us too!
Tips & Notes:
Nutrition Information: Serving: 1 | Calories: | Carbohydrates: | Protein: | Fat: | Sodium: | Fiber: | Sugar:
Nutritional information is provided as a courtesy and calculated automatically. Values can vary depending on the brands and ingredients you use, so if you’re tracking closely, I recommend calculating with your own preferred tool.