
The aroma of sweet buttermilk syrup wafting through the air can transport you back to lazy Sunday mornings, waking up slowly to the sound of sizzling pancakes or waffles on the griddle. It invokes a sense of warmth and connection, where families gather around the breakfast table, sharing stories and laughter over drizzles of glistening syrup. Homemade Buttermilk Syrup has a way of sweetening not just the meal but the bonds we form with one another. This delightful treat has the power to revitalize traditions and create new memories, filling our kitchens with love and comfort.
Why We Still Make Homemade Buttermilk Syrup Today
Homemade Buttermilk Syrup is more than just a topping for your breakfast. It is a bridge to the past, a recipe passed down through generations. In my family, this syrup represents warmth, hospitality, and nurturing love. Growing up, my grandmother would prepare it nearly every Sunday, filling our home with its golden sweetness. The ritual of gathering around the table, forks in hand, created a space for laughter and conversation that made us feel whole.
In today’s fast-paced world, the value of homemade meals cannot be overstated. As we navigate busy weeks, the act of creating something from scratch invites us back to simpler times. Each spoonful of this luscious syrup embodies comfort; as it soaks into pancakes or gets drizzled over warm waffles, it brings a sense of home that is irreplaceable.

In this syrup, you find not just a blend of ingredients but the history of a family tradition, evoking feelings of unity and celebration. Each recipe may have different variations, but the essence remains the same: a loving touch that brings us closer together. By making Homemade Buttermilk Syrup, we keep alive the connections to our past while embracing the present.
Preparing Homemade Buttermilk Syrup
“Every time I stir this pot, it smells just like Sunday at home.”
The process of making Homemade Buttermilk Syrup is as delightful as enjoying it, weaving together aromas and rich textures that dance harmoniously in the kitchen. It begins with a few simple ingredients that transform into golden syrup, bubbling gently on the stove. With a soft, creamy texture and a deeply sweet aroma, this syrup is bound to be a hit every time.
Gather the following ingredients to get started:
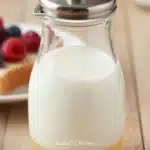
- 1 cup buttermilk
- 1 cup sugar
- 1/2 cup butter
- 1 teaspoon baking soda
- 1 teaspoon vanilla extract
These ingredients combine to create a syrup that is rich and luxurious. The buttermilk provides a tangy depth, while the sugar sweetens the mix, and butter adds a creamy layer. Each component plays its part in creating a beautifully balanced flavor profile, making each drizzle more irresistible than the last.
Gathering the Ingredients
Having the right ingredients makes all the difference in the world. Here’s a detailed list of what you’ll need to create this lovely syrup.
- 1 cup buttermilk: This gives the syrup its characteristic flavor. Make sure it’s fresh to ensure the best taste.
- 1 cup sugar: White granulated sugar works wonders here. It dissolves easily and creates that sweet, syrupy goodness.
- 1/2 cup butter: Unsalted butter is preferable. It adds richness without introducing extra saltiness to the syrup.
- 1 teaspoon baking soda: This adds a lightness, causing the syrup to bubble and foam, giving it a delightful texture.
- 1 teaspoon vanilla extract: Use pure vanilla if you can; it makes a noticeable difference in flavor quality.
Each ingredient contributes not just flavor but also memories associated with family gatherings and shared laughter. The process of gathering them becomes part of the joy of cooking itself.
Step-by-Step Directions
Making Homemade Buttermilk Syrup is a simple process. Follow these steps to create your own:
- In a saucepan over medium heat, combine the buttermilk, sugar, and butter. Stir gently until everything begins to blend.
- Watch closely as the mixture heats up; it should come to a gentle boil. When you see the first bubbles, this is your cue to remove it from the heat.
- Carefully stir in the baking soda and vanilla extract. It will bubble up as you add them, creating a light and airy syrup.
- Allow the syrup to cool slightly. The aroma filling the air will pull everyone into the kitchen, eager to enjoy.
- Serve while warm over pancakes, waffles, or crepes. The golden syrup will drizzle beautifully, making every bite a delight.
Cooking this syrup is like creating a warm embrace for your breakfast. The blend of ingredients comes together to form a glossy finish, inviting and comforting, ready to bring a smile to every face around the table.
Sharing Homemade Buttermilk Syrup With Loved Ones
When it comes time to serve Homemade Buttermilk Syrup, the excitement in the air is palpable. Picture yourself at the breakfast table, surrounded by family, with the syrup sitting proudly in a decorative jar, golden and glistening in the morning light.
Pouring the syrup over fluffy pancakes or warm waffles creates a delightful moment, watching the syrup slowly seep into every nook and cranny. It glistens as it catches the light, and the warmth of it brings everyone closer, both physically around the table and emotionally as memories are rekindled.

We often pair it with fresh fruits like sliced bananas, strawberries, or blueberries, creating a vibrant display on the plate. The balance of flavors—sweet, tangy, and fruity—makes the meal feel complete. Everyone digs in with eager anticipation, laughter punctuating the air as syrup spills over the plate. Each bite takes you back to those cherished Sunday mornings spent together.
Keeping the Comfort Alive
Once you’ve enjoyed this syrup, you may want to save some for later. Proper storage ensures you can savor the flavors of Homemade Buttermilk Syrup long after breakfast has ended.
To store, pour any unused syrup into a glass jar or an airtight container once it has cooled completely. Keep it refrigerated where it can last for up to two weeks. The flavors deepen as it sits, often tasting even better the next day as the ingredients meld together harmoniously.
To reheat, pour the desired amount into a small saucepan and warm over low heat, stirring gently until just warmed through. You can also microwave it for about 10-15 seconds, but be sure to watch closely to prevent it from bubbling over.
Dalida’s Little Secrets
Over the years, I’ve learned a few tips that can enhance your experience with Homemade Buttermilk Syrup:
Substitutions: If you run out of buttermilk, you can make a quick substitute using regular milk mixed with a tablespoon of lemon juice or vinegar. Allow it to sit for 5-10 minutes until it thickens slightly.
Tools: A whisk is handy to ensure the buttermilk and butter dissolve entirely. Using a heavy-bottomed saucepan helps distribute heat evenly, which prevents burning.
Timing: The key to a glossy syrup is not to overheat. Watch closely for that first bubble – it’s better to remove it from heat a few moments early than to risk burning the sugar.
Texture cues: You want the syrup to be thick enough to coat the back of a spoon. If it runs off too quickly, it might need a little more time on the stove.
Variations: Toss in a pinch of cinnamon or a bit of maple syrup for a unique twist. Personalized tweaks keep the tradition fresh and exciting.
Family Twists on Homemade Buttermilk Syrup
In my family, we love to make variations on the classic recipe. Each twist adds a touch of our character, weaving our heritage into this simple concoction. For instance, some relatives like to infuse the syrup with orange zest or cinnamon for an extra layer of flavor. This regional touch brings the brightness of citrus or the warmth of spice, depending on the season.
Growing up, I remember my aunt making a vanilla bean version, complete with flecks of the real vanilla scattered throughout the syrup. It would create that rich, aromatic experience that paired beautifully with her homemade buttermilk pancakes.
These family twists remind us how food evolves, reflecting our journey as a family while still honoring our roots. They make each experience unique and special, inviting new memories to form around the table.
FAQs About Homemade Buttermilk Syrup
Can I use honey instead of sugar?
Yes, it gives a softer sweetness and reminds me of my mother’s spring version. Honey adds a floral note that elevates the syrup in a delightful way.
What if I don’t have buttermilk?
You can easily make a substitute with regular milk. Simply mix a tablespoon of vinegar or lemon juice with milk and let it sit for a few minutes before using.
How can I thicken the syrup?
If your syrup isn’t thickening as desired, you can simmer it for a bit longer to help concentrate the flavors and achieve the right consistency.
Can I freeze buttermilk syrup?
While it’s best fresh, you can freeze it. Place it in an airtight container and it will keep for up to three months. Just thaw overnight in the refrigerator and reheat as described.
What do I serve with this syrup?
Homemade Buttermilk Syrup pairs beautifully with pancakes, waffles, French toast, or even drizzled over ice cream for a delightful dessert.
Conclusion
The ritual of preparing Homemade Buttermilk Syrup is a journey through the heart of your kitchen. It encapsulates memories of family gatherings filled with laughter and satisfaction. By making this syrup, you’re not just creating a delicious topping but participating in a tradition that strengthens the bonds of family.
Should you find yourself seeking more recipes that resonate with the heart, consider exploring Grandma’s Buttermilk Syrup Recipe for additional inspiration. Or, if you’re interested in variations, perhaps the Buttermilk Syrup Recipe will spark new ideas.
Through this simple syrup, we continue to share and nourish our loved ones, allowing the past to blend beautifully with the present. May your kitchen always be filled with warmth, stories, and this delicious Homemade Buttermilk Syrup.

Homemade Buttermilk Syrup
Ingredients
Method
- In a saucepan over medium heat, combine the buttermilk, sugar, and butter. Stir gently until everything begins to blend.
- Watch closely as the mixture heats up; it should come to a gentle boil. When you see the first bubbles, this is your cue to remove it from the heat.
- Carefully stir in the baking soda and vanilla extract. It will bubble up as you add them, creating a light and airy syrup.
- Allow the syrup to cool slightly before serving.
- Serve warm over pancakes, waffles, or crepes.