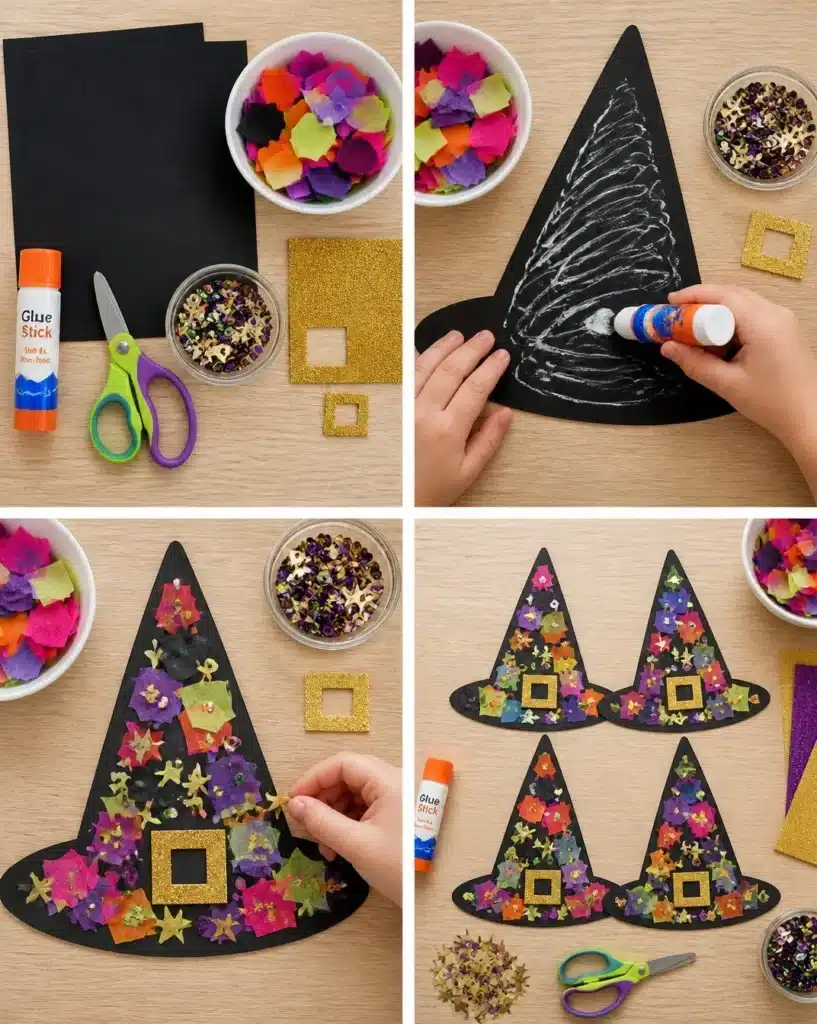
Witch Hat Collage Craft for Kids is a delightful way to celebrate creativity while getting into the spirit of the season. This fun and easy DIY project provides children with an opportunity to express their artistic skills by making festive witch hats that can be displayed at home or used during Halloween gatherings. The process blends simple cutting, gluing, and decorating, allowing for personalization and imaginative freedom. You may also find 5 Surprising Benefits Of Collagen Jello Cubes For Appetite Control useful.
Why You’ll Want to Make Witch Hat Collage Craft for Kids
This craft stands out for various reasons. To begin with, the materials are easy to gather, making it accessible for families. Kids will enjoy the hands-on approach of creating something visually striking and fun. Each finished piece can serve as a seasonal decoration or a playful accessory for a costume, which adds value beyond just a one-time craft session. The added sparkle from glitter and colorful pieces creates a vibrant effect that catches the eye. You may also find Discover The Banana Trick For Weight Loss That Actually Works useful.
By engaging in projects like this, children can develop fine motor skills while also learning to express their individuality. The Witch Hat Collage Craft not only offers creative fun but also tap into the enchantment of the Halloween season. You may also find 5 Delicious Berberine Smoothie Recipes For Weight Loss Success useful.

Before You Start
Before diving into the crafting process, it’s important to know a few key points. The overall goal is to create whimsical witch hats that can be proudly displayed. Each hat will have a unique touch based on the child’s imagination and choices of colors, shapes, and additional embellishments.
Consider setting up a crafting area with plenty of newspaper or an old tablecloth to protect surfaces from glue spills. Ensure children’s hands are clean before beginning, as working with glue and decorations can get messy.
Additionally, adult supervision is recommended, especially when children are using scissors or applying glue, to ensure safety and assist with delicate steps.
What You’ll Need for Witch Hat Collage Craft for Kids
Gather the following materials to create your Witch Hat Collage Craft:
- 2 sheets of 9×12 inch black construction paper
- 1 pair of child-safe safety scissors
- 1 stick of non-toxic washable craft glue
- 1 cup of assorted colorful tissue paper squares
- 0.5 ounces of mixed star confetti and sequins
- 1 sheet of gold glitter foam paper
These supplies are straightforward to find, and you may already have a number of them at home. The black construction paper will serve as the base for the witch hats, while the vibrant tissue paper, sequins, and glitter will add delightful decorations that truly bring the project to life.
Helpful Tools
Ensure you also have additional tools to support the crafting process effectively:
- A flat surface for gluing
- Paper towels or a damp cloth for quick clean-ups
- A small container for holding glue if desired
How to Make Witch Hat Collage Craft for Kids
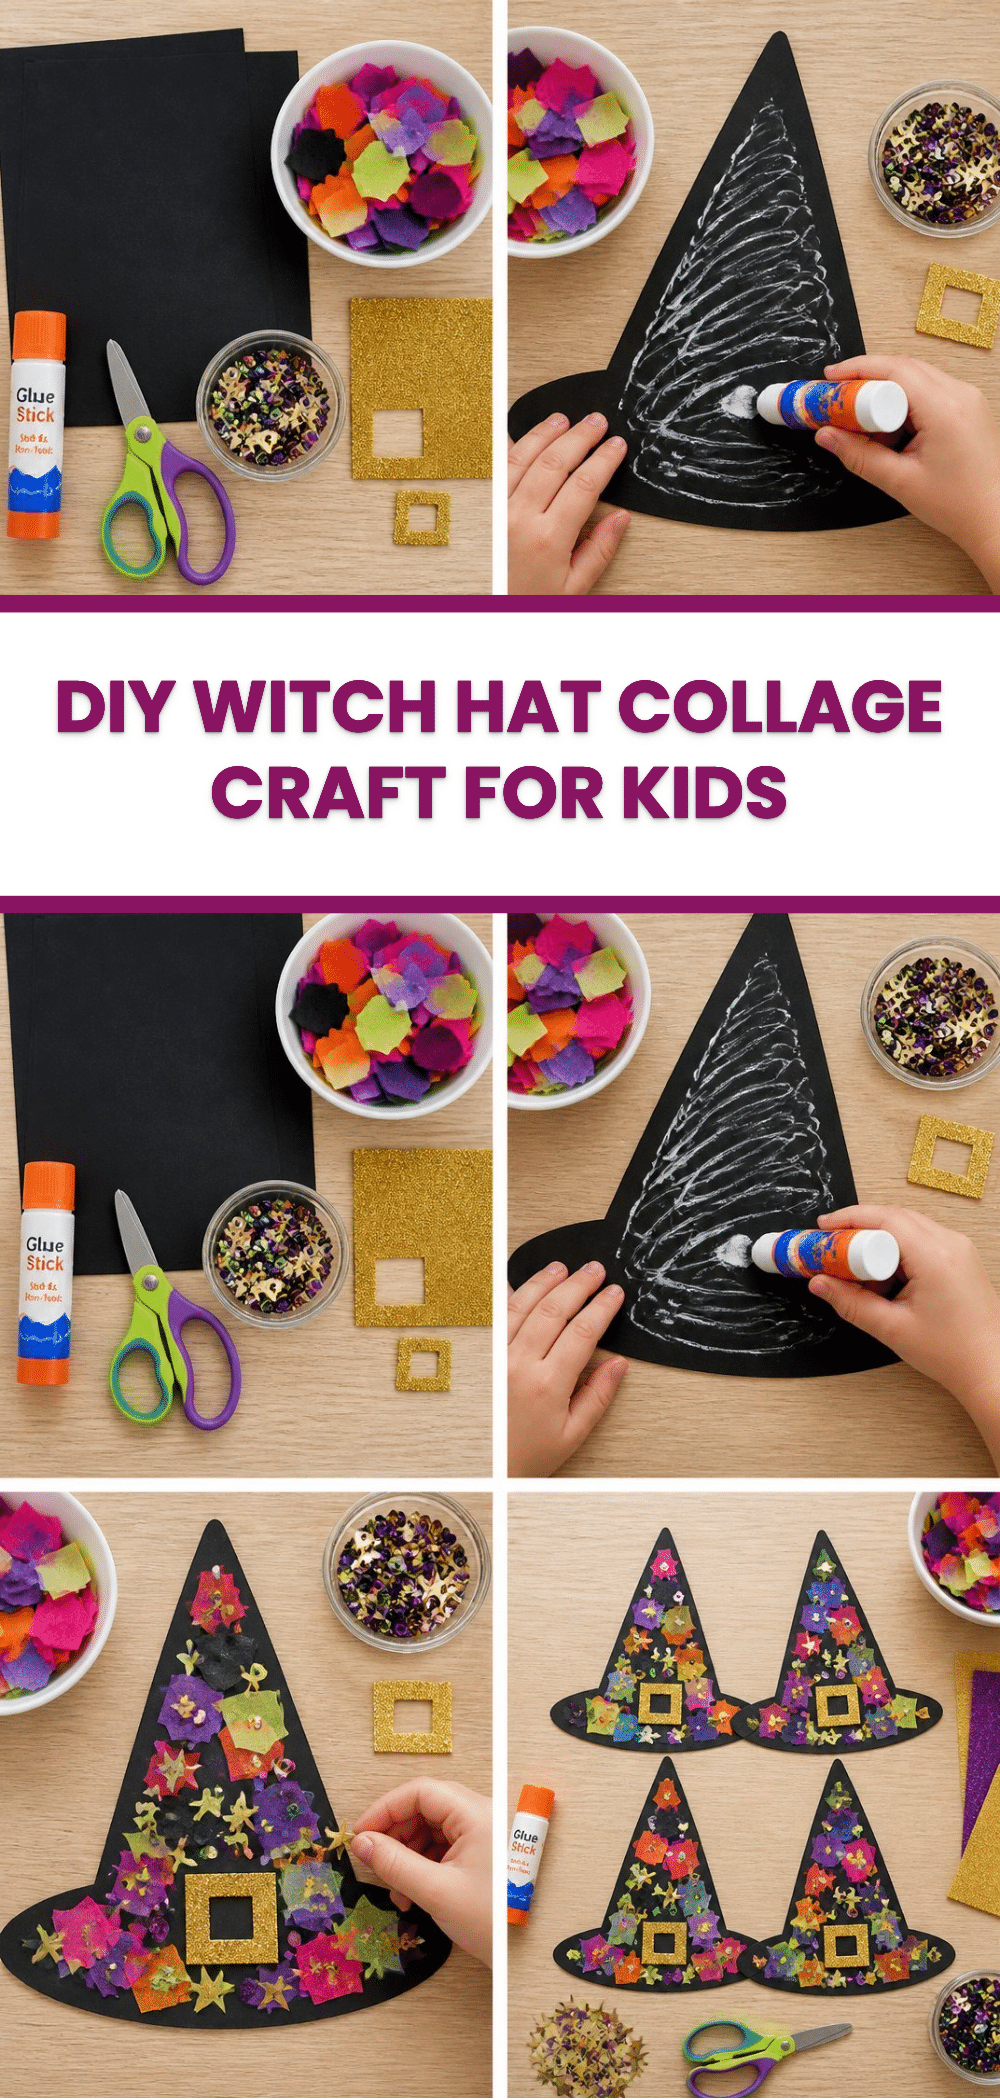
- Start by cutting out large witch hat shapes from the black construction paper. Guide little hands as they use the safety scissors to create the iconic pointy shape of the hats.
- Next, cut small square buckles from the gold glitter foam paper, adding a touch of sparkle to the hats that will catch the eye.
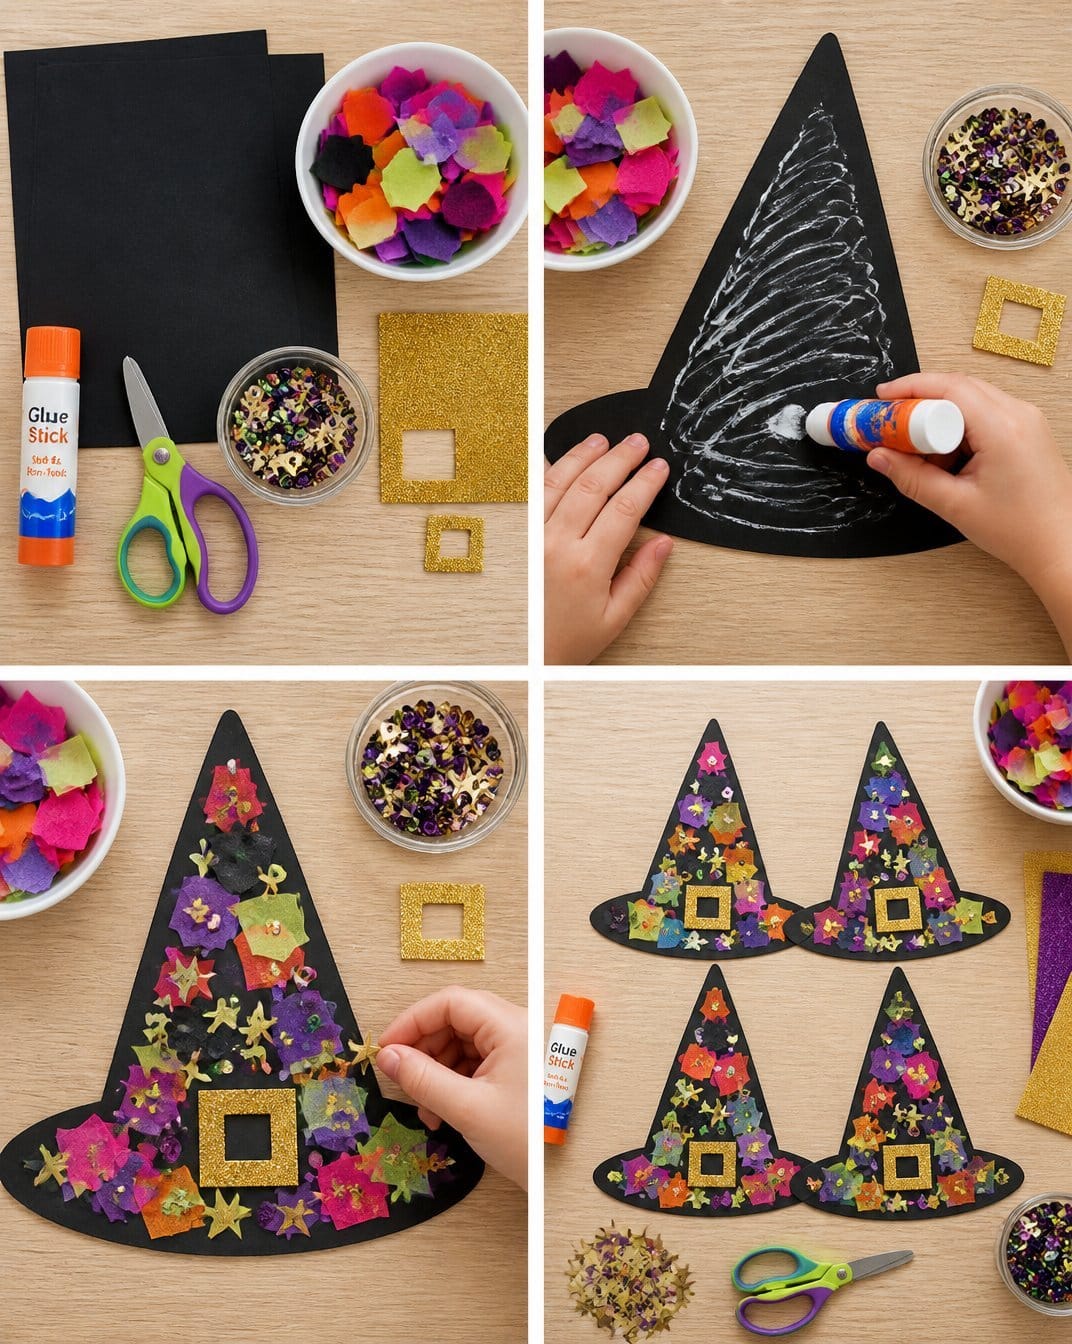
- Spread a layer of craft glue on the surface of the hats. Invite the kids to place colorful tissue paper squares, star confetti, sequins, and the glittery buckles lovingly onto the glued areas.
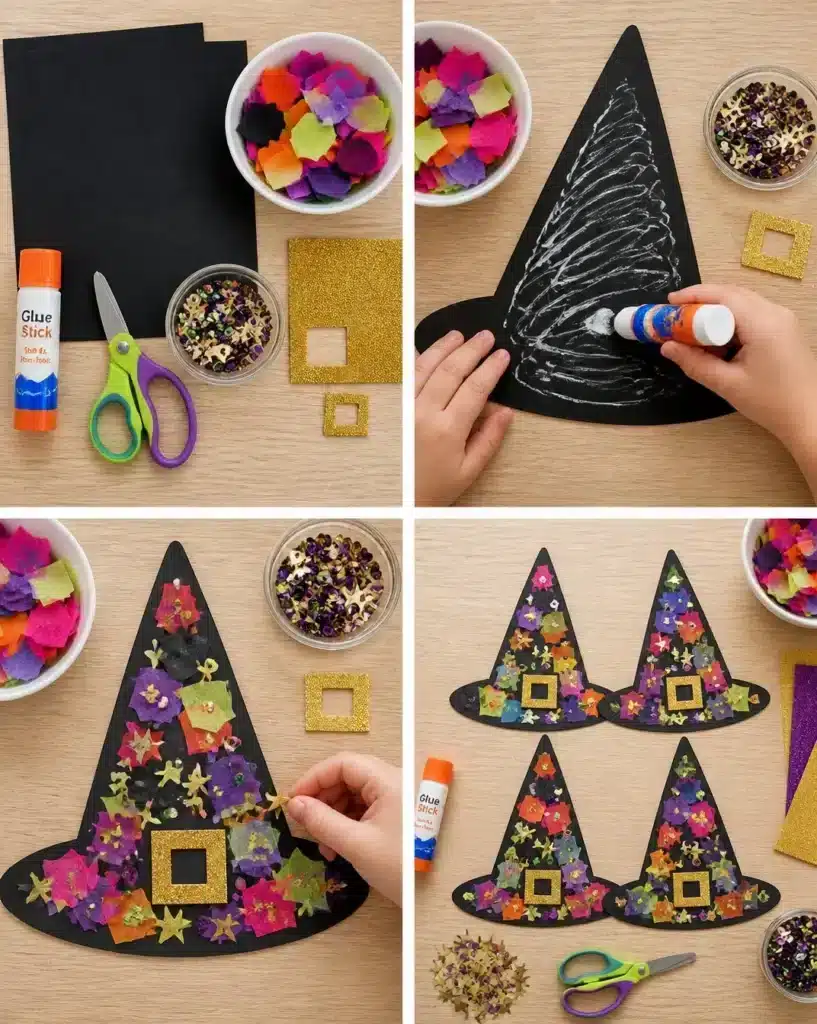
- Once decorated, let the witch hats dry fully for about 15 minutes before displaying those delightful creations around the house.
Ideas for Using Your Finished Craft
After completing the witch hats, there are numerous ways to showcase your children’s creativity. Hang them in windows for extra flair or place them on a decorative shelf to brighten up the room. These hats can also be perfect for Halloween parties, serving as whimsical placeholders or simple decorations for your festivities.
Consider using these crafts as part of a school display or classroom decorations around the time of Halloween for a collective art showcase.
Tips for the Best Result
To ensure the best possible outcome with your Witch Hat Collage Craft, keep these helpful tips in mind:
- Use a thin layer of glue to prevent excess bubbling under decorations.
- Allow the glue to dry fully before handling to keep all pieces securely in place.
- When placing tissue paper, overlap them slightly to achieve a rich and textured appearance.
- Encourage children to experiment with different arrangements of the decorations before finalizing their choices.
Common Mistakes to Avoid
Crafting is a learning process, and mistakes can happen. Here are some common pitfalls and how to fix them:
- Too Much Glue: If too much glue is applied, it may cause the decorations to slide around. Use a thin layer instead and let kids practice applying a small amount with their fingers.
- Wrinkled Paper: If the tissue paper wrinkles when glued, gently smooth it out while it’s still wet, or allow practice to encourage a lighter touch.
- Uneven Cuts: Ensure themed shapes are cut cleanly for a polished look; guide children to take their time while using scissors.
Creative Ways to Make It Your Own
To add a personal twist to the witch hats, consider these fun variations:
- Use different colors of construction paper for unique styles.
- Incorporate different kinds of embellishments, like feathers or themed stickers.
- Experiment with paint or markers to add designs or messages to the hats.
- Personalize each hat with the child’s name or initials using additional materials.
These creative options allow kids to use their imaginations while making a recognizable craft.
How to Store Witch Hat Collage Craft for Kids
To keep your crafted witch hats looking their best, store them in a safe space away from direct sunlight to prevent fading. You can stack them gently or hang them on a small display hook. If the decorations are delicate, use a clear plastic bin to protect them during storage.
A Quick Safety Note
When crafting with children, always supervise the use of safety scissors to prevent any accidental injuries. Teach them the correct way to use scissors and remind them to be careful while cutting.
FAQs About Witch Hat Collage Craft for Kids
How long does it take to make?
The project typically takes around 30-45 minutes, including drying time.
Can I use a different material for the hats?
While black construction paper is recommended, any colored paper can work for a unique touch.
How should I store my finished craft?
Keep them in a dry place away from sunlight to avoid fading.
Can I change the size of the hats?
Yes, simply adjust the dimensions you cut from the construction paper.
Can my child make it alone?
This project requires some adult supervision, especially with scissors and glue.
Conclusion
Creating a Witch Hat Collage Craft for Kids is a fantastic way to engage children in a creative activity that results in charming decorations for the season. This craft promotes artistic expression while being a fun and imaginative endeavor together. For further crafts and ideas, consider checking out projects like the Witch Shape Craft or explore more suggestions with 20 Witch Crafts for Kids that inspire your little ones to get crafty on Halloween!
Follow us on social for more recipe ideas & inspiration!
Witch Hat Collage Craft for Kids
Would you like to save this recipe?
By submitting you agree to receive this recipe and occasional emails. Unsubscribe anytime.
Ingredients
Craft Materials
- 2 sheets sheets of 9x12 inch black construction paper Base for the witch hats.
- 1 pair pair of child-safe safety scissors For cutting hat shapes.
- 1 stick stick of non-toxic washable craft glue For attaching decorations.
- 1 cup cup of assorted colorful tissue paper squares Decorative elements for hats.
- 0.5 ounces mixed star confetti and sequins For added sparkle.
- 1 sheet sheet of gold glitter foam paper For creating hat buckles.
Instructions
Preparation
- Set up a crafting area with newspaper or an old tablecloth to protect surfaces.
- Ensure children’s hands are clean and supervise the use of scissors.
Crafting the Hats
- Cut out large witch hat shapes from black construction paper.
- Cut small square buckles from gold glitter foam paper.
- Spread a layer of craft glue on the surface of the hats.
- Place colorful tissue squares, star confetti, sequins, and glittery buckles on glued areas.
- Let the hats dry fully for about 15 minutes before displaying.
Last Step: Don’t forget to leave a rating and comment below! It helps other readers find the best recipes — and it helps us too!
Tips & Notes:
Nutrition Information: Serving: 1 | Calories: | Carbohydrates: | Protein: | Fat: | Sodium: | Fiber: | Sugar:
Nutritional information is provided as a courtesy and calculated automatically. Values can vary depending on the brands and ingredients you use, so if you’re tracking closely, I recommend calculating with your own preferred tool.