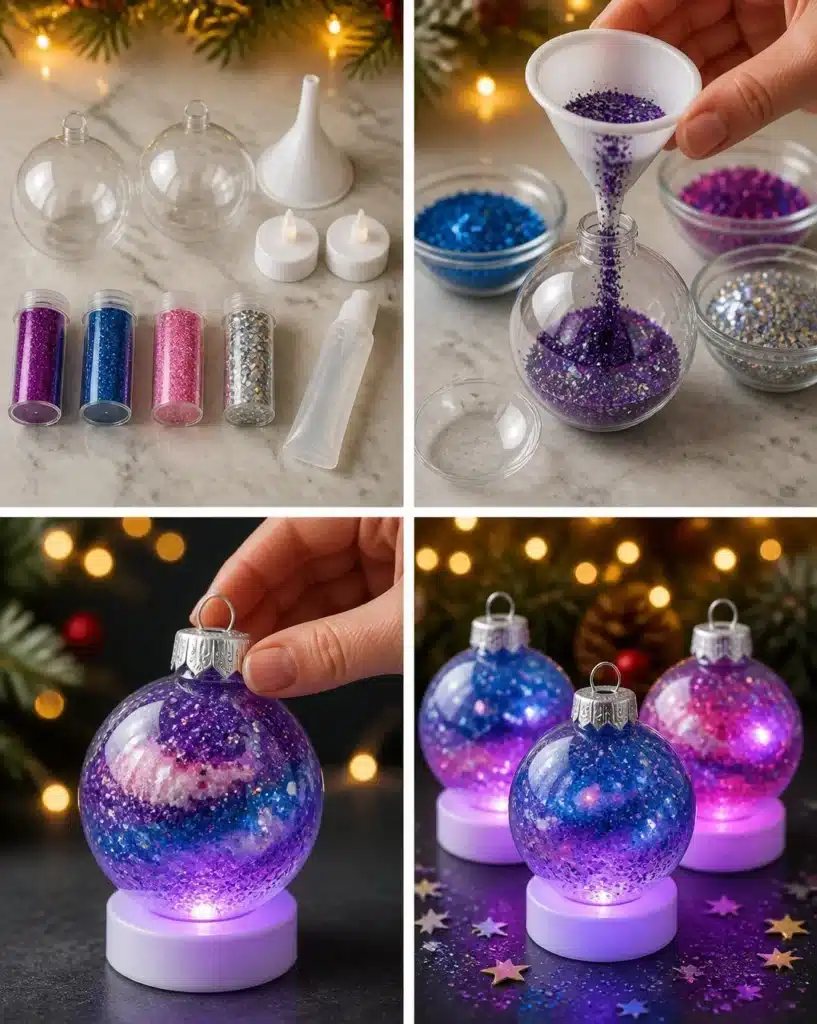
DIY Celestial Galaxy Ornaments are a mesmerizing craft project that combines creativity with simplicity, perfect for adding a touch of cosmic charm to your home decor. Imagine hanging these stunning ornaments from your Christmas tree, placing them in windows, or even giving them as thoughtful gifts. The best part? They are surprisingly easy to make with just a few materials and straightforward steps, ensuring that anyone, from beginners to seasoned crafters, can create their own glowing galaxy spheres. You may also find DIY Celestial Galaxy Ornaments useful.
Why You’ll Want to Make DIY Celestial Galaxy Ornaments
Making DIY Celestial Galaxy Ornaments isn’t just about crafting; it’s about unleashing your creativity and infusing your space with handmade decor that dazzles. Using easy-to-find materials like clear plastic ornament spheres, glitter, and LED tealights, you can create stunning pieces that catch the light and sparkle beautifully. This project is not only budget-friendly but also encourages customization, allowing you to choose your glitter colors and designs to reflect your personal style. Plus, they make for meaningful gifts during the holiday season or special occasions, showcasing the effort and thought you’ve put into creating something unique. You may also find DIY Celestial Galaxy Ornaments useful.
Before You Start
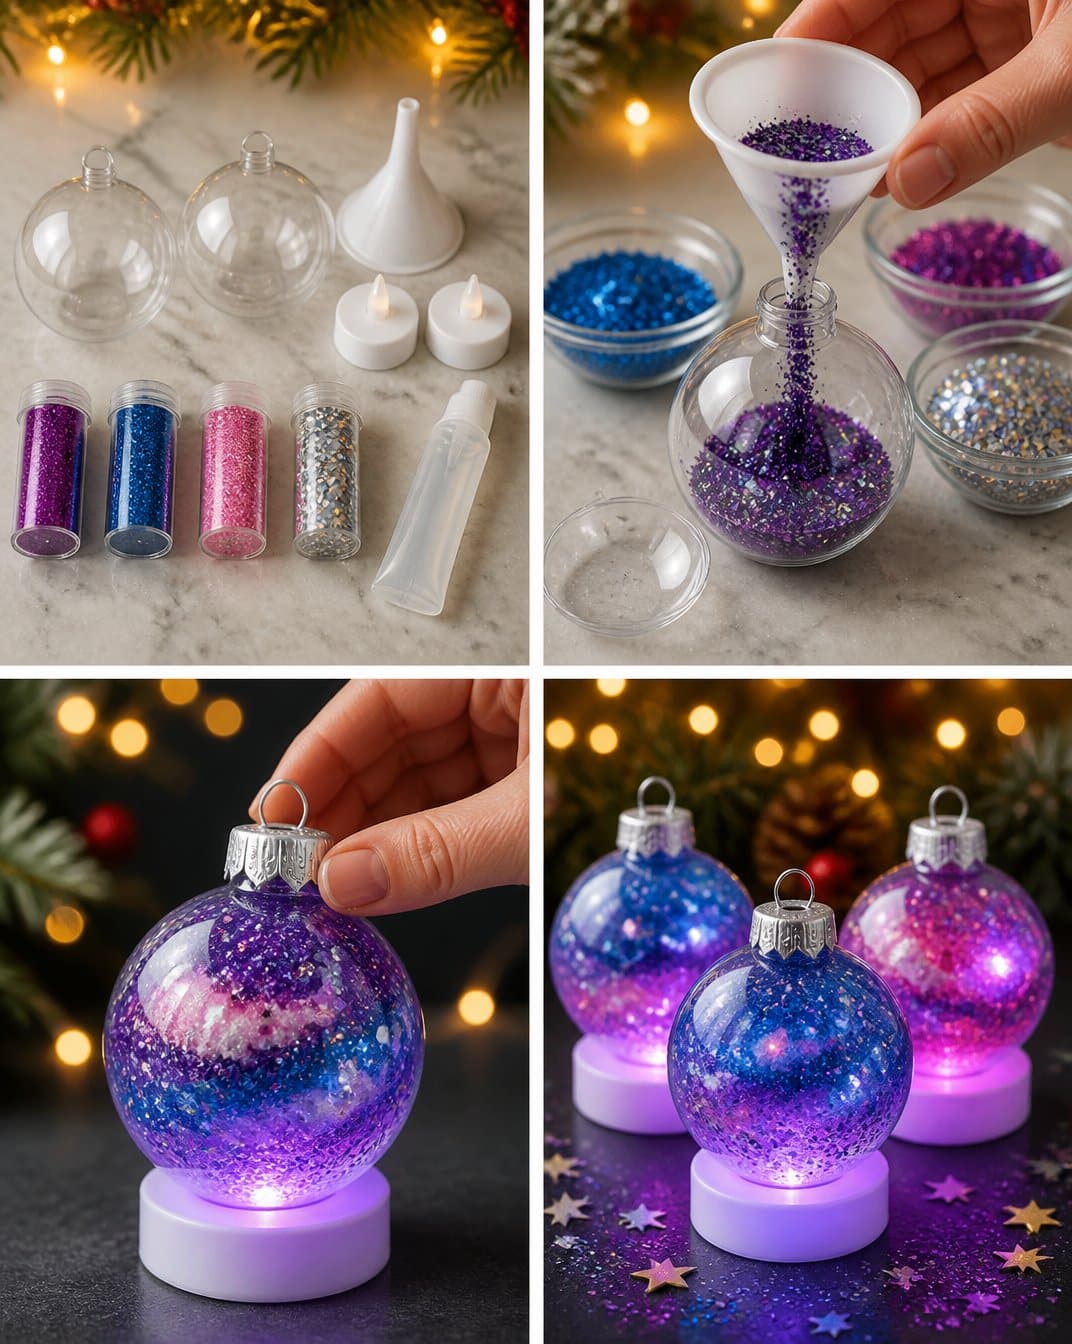
Before diving into the crafting process, it’s essential to gather everything you need and set up your workspace. The project is simple and involves layering glitter and glue to create the cosmic effect, followed by some assembly. You’ll end up with two visually appealing ornaments that will illuminate beautifully when the LED tealights are added. Ensure your workspace is clean and protected to avoid any messes, and keep in mind that adult supervision may be required when handling materials like glue. You may also find Coconut Water Cloud Coffee Boosts Focus useful.
What You’ll Need for DIY Celestial Galaxy Ornaments
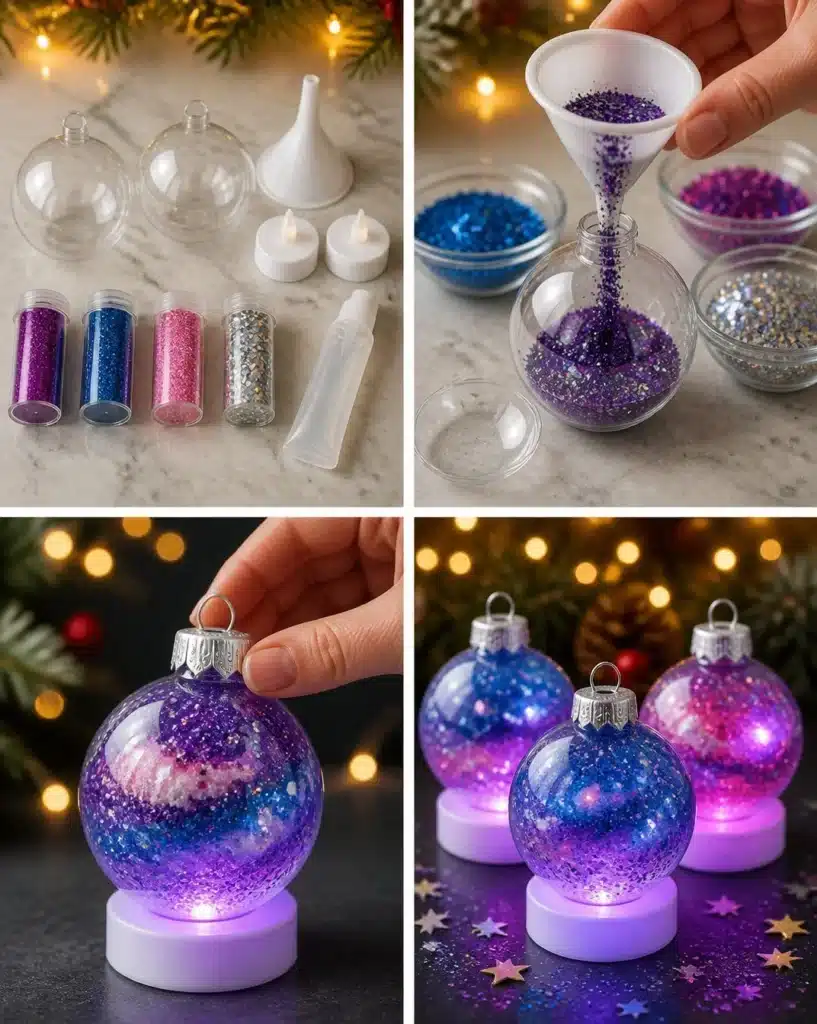
- 2 clear plastic ornament spheres
- 4 tablespoons assorted cosmic glitter
- 1 small funnel
- 2 LED tealight bases
- 1 tube clear craft glue
When choosing your glitter, consider using a mix of coarse and fine textures to create depth in your galaxy effect. The clear craft glue is essential for ensuring the glitter adheres well to the inner surfaces of your ornaments.
Helpful Tools
Although the materials listed above are primarily what you’ll need, having a pair of scissors and a small clean cloth can come in handy for cleaning as you work.
How to Make DIY Celestial Galaxy Ornaments
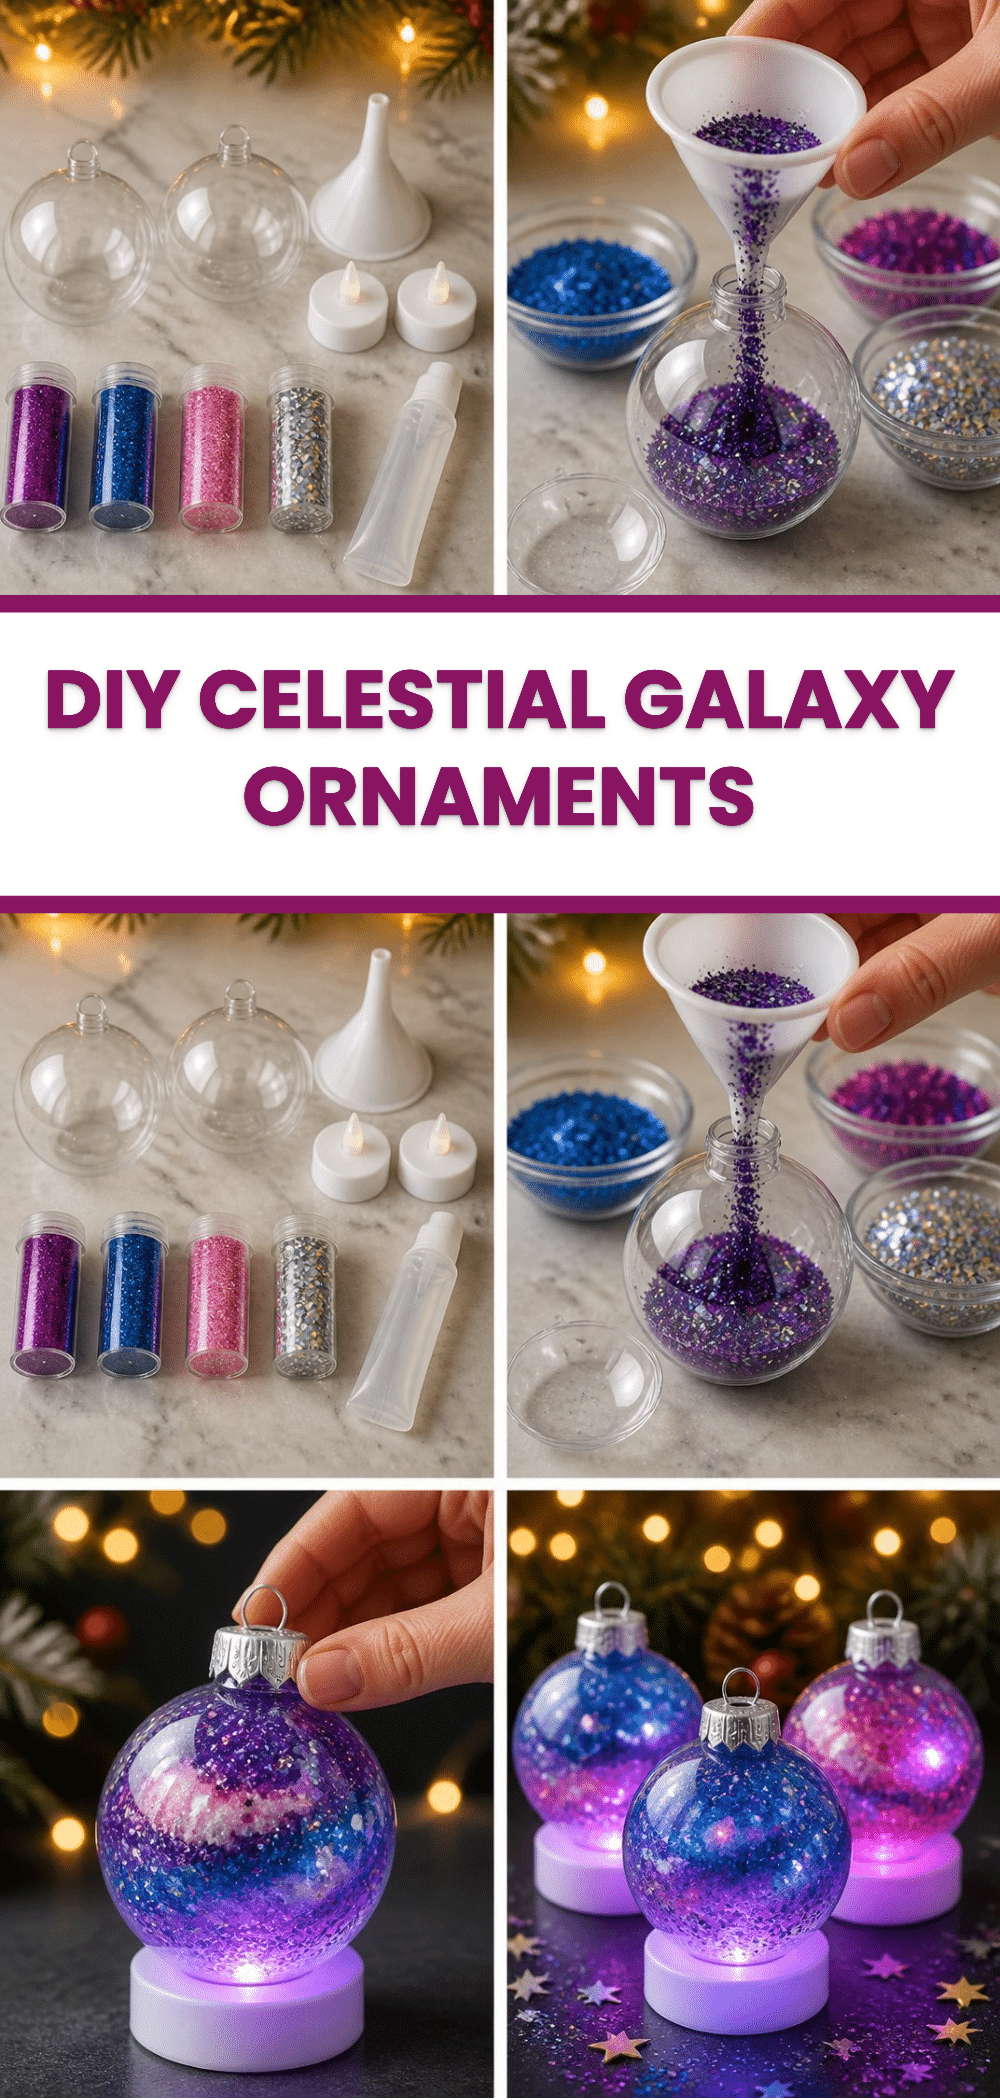
- Open the clear ornament sphere and set it aside to prepare your canvas.
- Carefully use the funnel to pour the cosmic glitter inside, filling it up until it feels just right for your galaxy creation.
- Take the clear craft glue and spread a thin layer inside the sphere; this will help the glitter stick and twinkle beautifully.
- Give the ornament a gentle shake to coat it evenly this is the magic moment for that galaxy effect!
- Finally, attach the LED tealight base to the bottom of the ornament, securing the cap to finish your glowing masterpiece.
As you work through these steps, take note of the colors and effects you’re creating. Shake gently to avoid clumping, ensuring that your glitter disperses nicely.
How to Display DIY Celestial Galaxy Ornaments
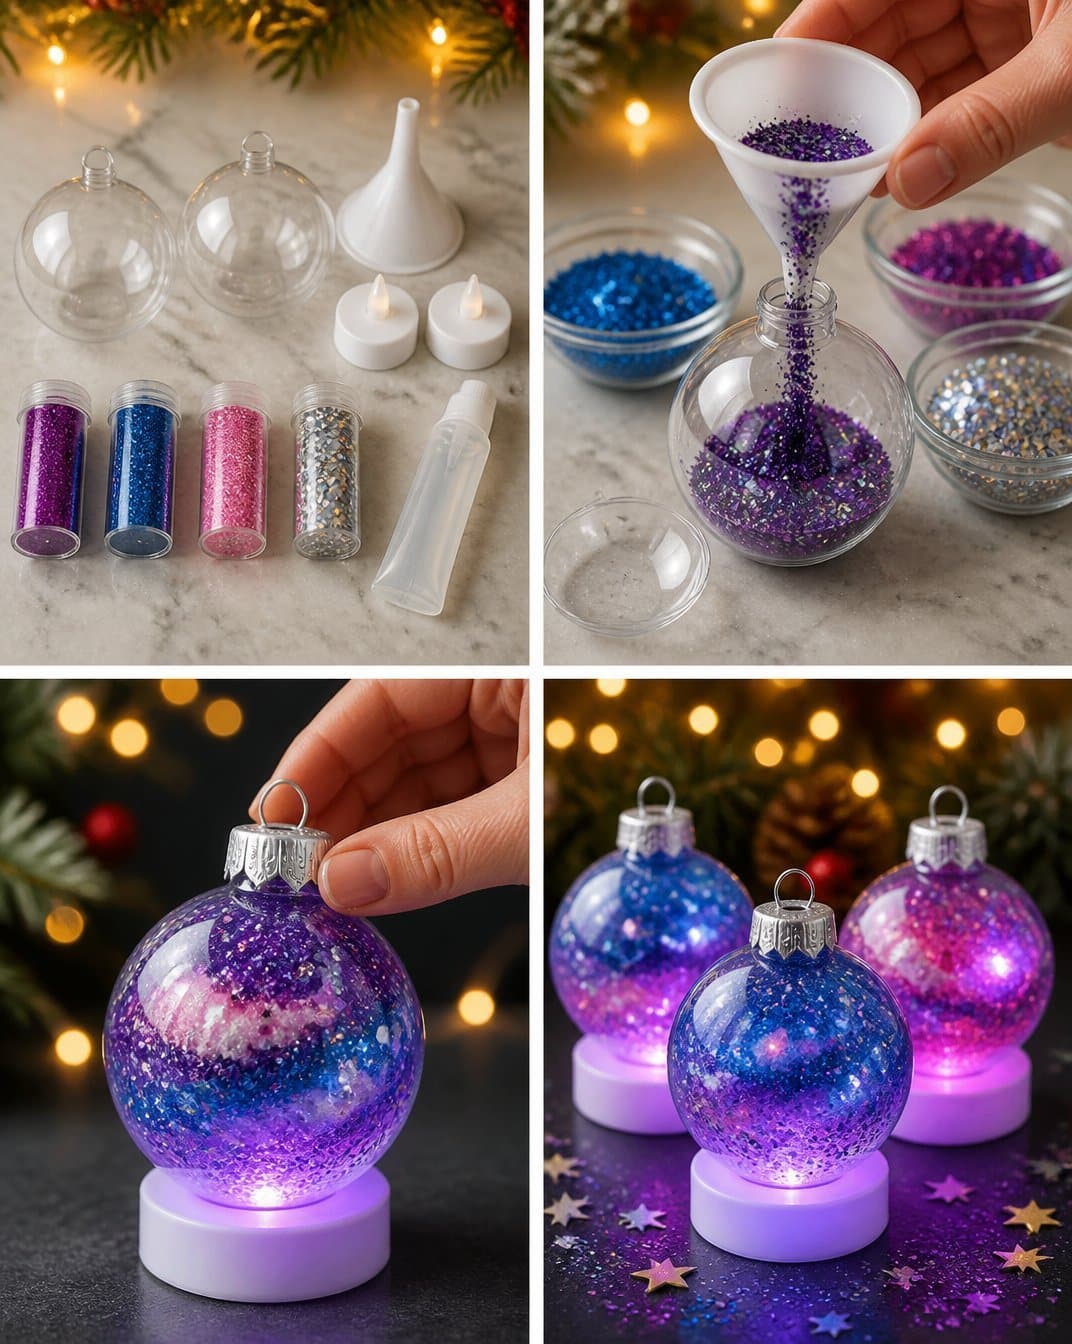
Once your DIY Celestial Galaxy Ornaments are completed, you can display them in many delightful ways. They look stunning when hung from trees or displayed on windowsills where natural light can enhance their sparkle. You could also use them as table centerpieces during gatherings or celebrations or make them part of seasonal decorations.
Tips for the Best Result
- Use a small amount of glue to avoid excess that can soggily dull the glitter’s sparkle.
- Shake gently to prevent the glitter from clumping, allowing for an even distribution.
- Allow glue to dry fully before moving on to avoid smudging.
- Position glitter layers with a mix of textures and colors for a more dynamic galaxy effect.
- Always protect your work surface to keep cleanup easy.
Common Mistakes to Avoid
One of the most common issues when making celestial ornaments is excess glue, which can cause the glitter to become dull and clumpy. To resolve this, ensure you apply a very thin layer of glue. If things do go awry, you can gently shake out collected glitter and reapply using a dry technique. Additionally, securing the LED tealight base tightly at the end is crucial to avoid falling apart. If it seems loose, reapply glue and let it set.
Creative Ways to Make It Your Own
There are numerous ways to personalize your Galaxy Ornaments! Consider experimenting with different color combinations of glitter or adding special elements like tiny stars or constellation stickers inside your ornaments. You might even opt to add personal touches like names or initials using paint or fine markers.
For a fun twist, consider using glow-in-the-dark glitter for a unique nighttime effect or even mix in iridescent elements for a dazzling finish. Remember, the customization possibilities are endless, turning each ornament into a statement piece.
How to Store DIY Celestial Galaxy Ornaments
To keep your ornaments looking fresh and new, store them in a dry place away from direct sunlight that could fade colors. If you have multiple ornaments, stacking them with soft tissue or fabric in between can prevent scratches and damage. When it’s time to display them again, a gentle dusting with a clean, dry cloth will help them shine.
A Quick Safety Note
While this project is beginner-friendly, it’s wise to have adult supervision if young children are involved, especially when using craft glue and handling small components.
FAQs About DIY Celestial Galaxy Ornaments
How long does it take?
The overall process typically takes about 1-2 hours, depending on drying times and personal decorating preferences.
What glue works best?
A clear craft glue works best for adhering glitter to the plastic surfaces of the ornaments.
Can children make it?
Yes! However, adult supervision is recommended, especially for younger children dealing with the funnel and glue.
Can I change the size of the ornaments?
Certainly! You can use different sizes of clear plastic ornaments based on your creative vision.
How should I store it?
Store them in a dry, cool place, stacking with padding to prevent scratches.
Conclusion
Crafting DIY Celestial Galaxy Ornaments provides a wonderful opportunity to let your creativity shine while creating beautiful decorative pieces. For further exploration of festive craft ideas like DIY Galaxy and Planet Christmas Ornaments, you can view more at DIY Galaxy and Planet Christmas Ornaments. Additionally, if you’re interested in incorporating unique shapes into your designs, consider checking out a suitable Polymer Clay Cutter for DIY Cosmic Earrings Galaxy Jewelry. Enjoy the process and embrace the beauty of your handmade celestial creations!
Follow us on social for more recipe ideas & inspiration!
Celestial Galaxy Ornaments
Would you like to save this recipe?
By submitting you agree to receive this recipe and occasional emails. Unsubscribe anytime.
Ingredients
Materials for Ornaments
- 2 pieces clear plastic ornament spheres Ensure they are of good quality.
- 4 tablespoons assorted cosmic glitter Mix coarse and fine textures for depth.
- 1 small funnel For pouring glitter into spheres.
- 2 pieces LED tealight bases To illuminate the ornaments.
- 1 tube clear craft glue Essential for adhering glitter to surfaces.
Helpful Tools
- 1 piece scissors For any trimming needs.
- 1 piece small clean cloth For cleaning up as you work.
Instructions
Preparation
- Open the clear ornament sphere and set it aside to prepare your canvas.
- Carefully use the funnel to pour the cosmic glitter inside, filling it up until it feels just right for your galaxy creation.
- Take the clear craft glue and spread a thin layer inside the sphere; this will help the glitter stick and twinkle beautifully.
- Give the ornament a gentle shake to coat it evenly — this is the magic moment for that galaxy effect!
Assembly
- Finally, attach the LED tealight base to the bottom of the ornament, securing the cap to finish your glowing masterpiece.
- Ensure your workspace is clean and protected to avoid any messes.
Last Step: Don’t forget to leave a rating and comment below! It helps other readers find the best recipes — and it helps us too!
Tips & Notes:
Nutrition Information: Serving: 2 | Calories: | Carbohydrates: | Protein: | Fat: | Sodium: | Fiber: | Sugar:
Nutritional information is provided as a courtesy and calculated automatically. Values can vary depending on the brands and ingredients you use, so if you’re tracking closely, I recommend calculating with your own preferred tool.