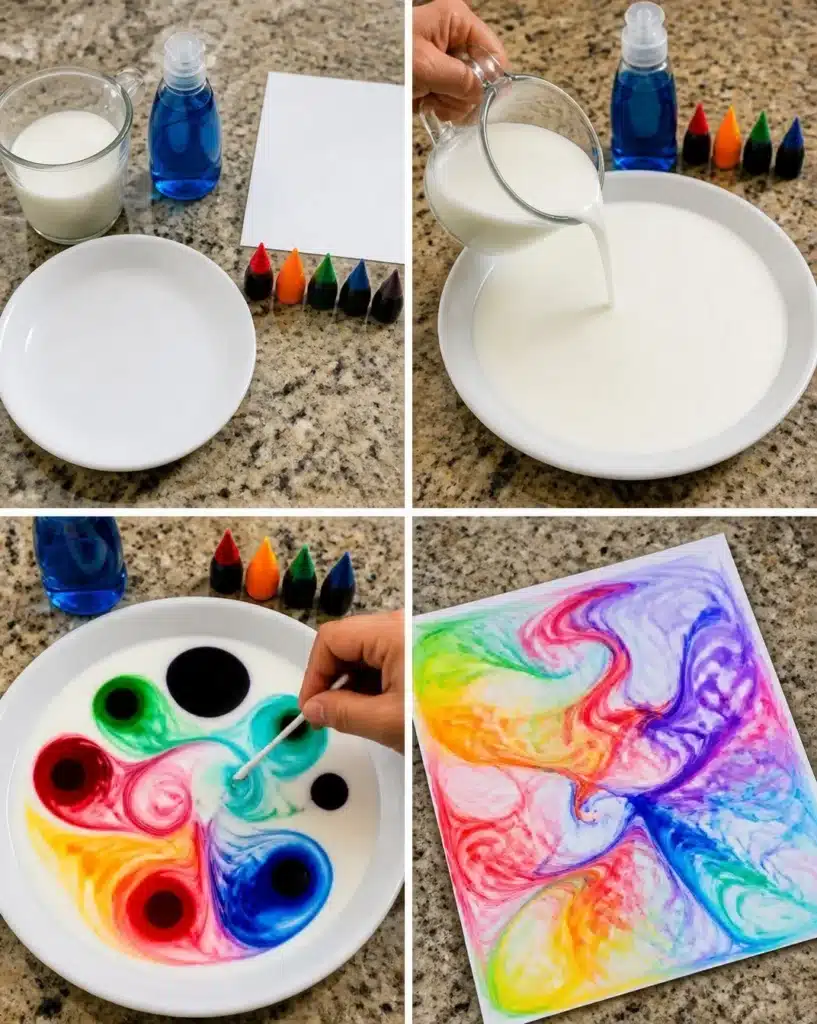
Why You’ll Want to Make Magical Rainbow Milk Swirl Print
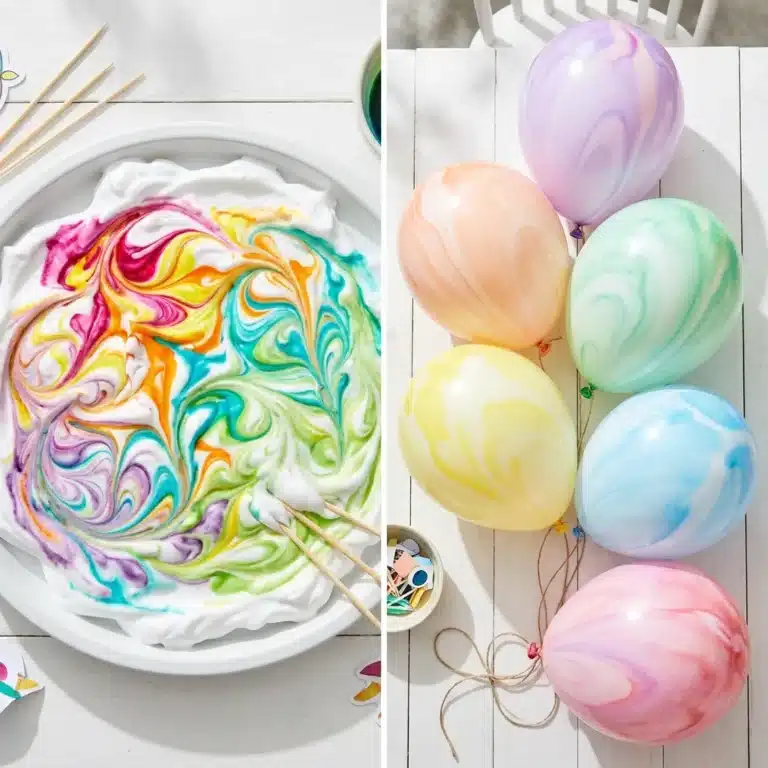
Imagine creating a vibrant swirl of colors that not only looks stunning but is a memorable activity for all ages. The Magical Rainbow Milk Swirl Print is an engaging DIY project that seamlessly combines science and art. This craft is perfect for family time, classroom projects, or even as a unique gift for friends and loved ones. It’s simple, requires minimal materials, and the results are enchanting, giving you colorful images that can be cherished for years to come. Not to mention, you’ll have the satisfaction of creating something beautiful from ordinary ingredients. Plus, if you’re a fan of hands-on projects, you’ll appreciate how similar scientific principles apply here, much like the delightful Blueberry Swirl Yogurt Bites you might have tried!
Before You Start
Creating the Magical Rainbow Milk Swirl Print is as easy as mixing colors on a palette. The basic process involves pouring milk into a dish, adding food coloring, and interacting with a soap-soaked cotton swab to ignite a vibrant display of colors. You’ll end up with a mesmerizing print that captures the whimsical movement of the colors as they dance and swirl before your eyes. You may also find Candy Cane Milkshake useful.
Before you begin, make sure to prepare your workspace. It’s a good idea to cover your table with newspaper or an old cloth to catch any spills. Keep in mind that this project does require adult supervision if younger kids are involved, especially when handling components like food coloring and soap. The final appearance of your art should be bright and lively, showcasing an array of swirling colors captured beautifully on paper. You may also find Chick Fil A Peppermint Milkshake useful.
Materials You’ll Need
- 1 cup milk
- Food coloring (various colors)
- Dish soap
- Paper (any plain type)
Make sure to use whole milk or a higher-fat milk, as it provides a richer canvas for the colors to swirl and blend. If using paper, consider a thicker type that can handle some moisture without tearing.
Helpful Tools
- Shallow dish (like a pie plate)
- Cotton swabs (or toothpicks)
- Dropper or small spoon for precise coloring
How to Make Magical Rainbow Milk Swirl Print
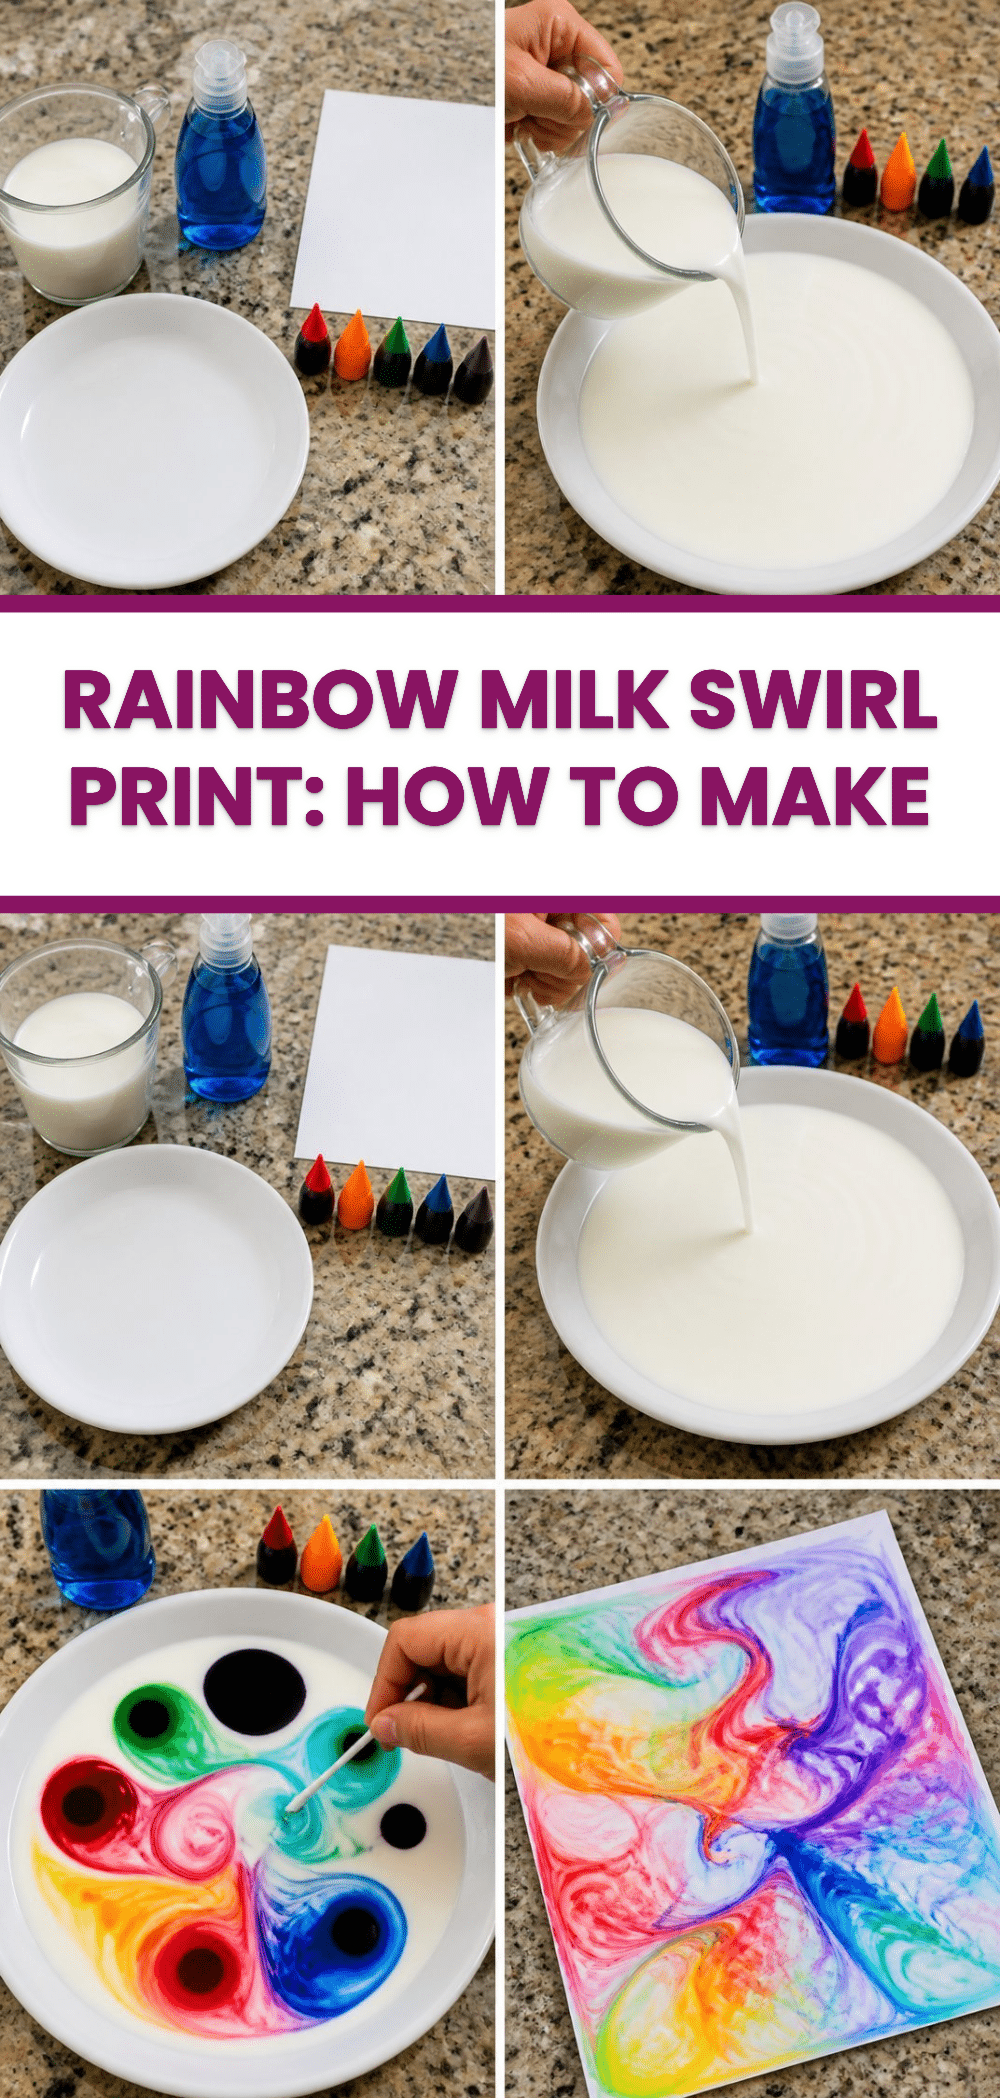
- Begin by pouring the milk into a shallow dish, making sure the bottom is entirely covered.
- Next, add several drops of food coloring in different spots across the surface of the milk let your creativity shine!
- Take a cotton swab and dip it into a small amount of dish soap.
- Now, gently touch the soapy cotton swab to the center of the color drops and watch in delight as the patterns start to swirl and dance.
- Finally, carefully lay a piece of paper on the surface of the milk to transfer those beautiful designs, then lift the paper and set it aside to dry. Take your time with each step let the kids discover the magic of mixing colors and creating something unique.
Ideas for Using Your Finished Craft
Once you have created your Magical Rainbow Milk Swirl Print, the uses for it are endless. Here are some fun ideas to showcase your creation:
- Frame your artwork and display it in your living room, or gift it to someone special.
- Use the prints as decorative elements for handmade greeting cards or invitations.
- Decorate your child’s room by hanging them as colorful wall art.
- Incorporate the prints as part of a creative project in school or summer camps.
Tips for the Best Result
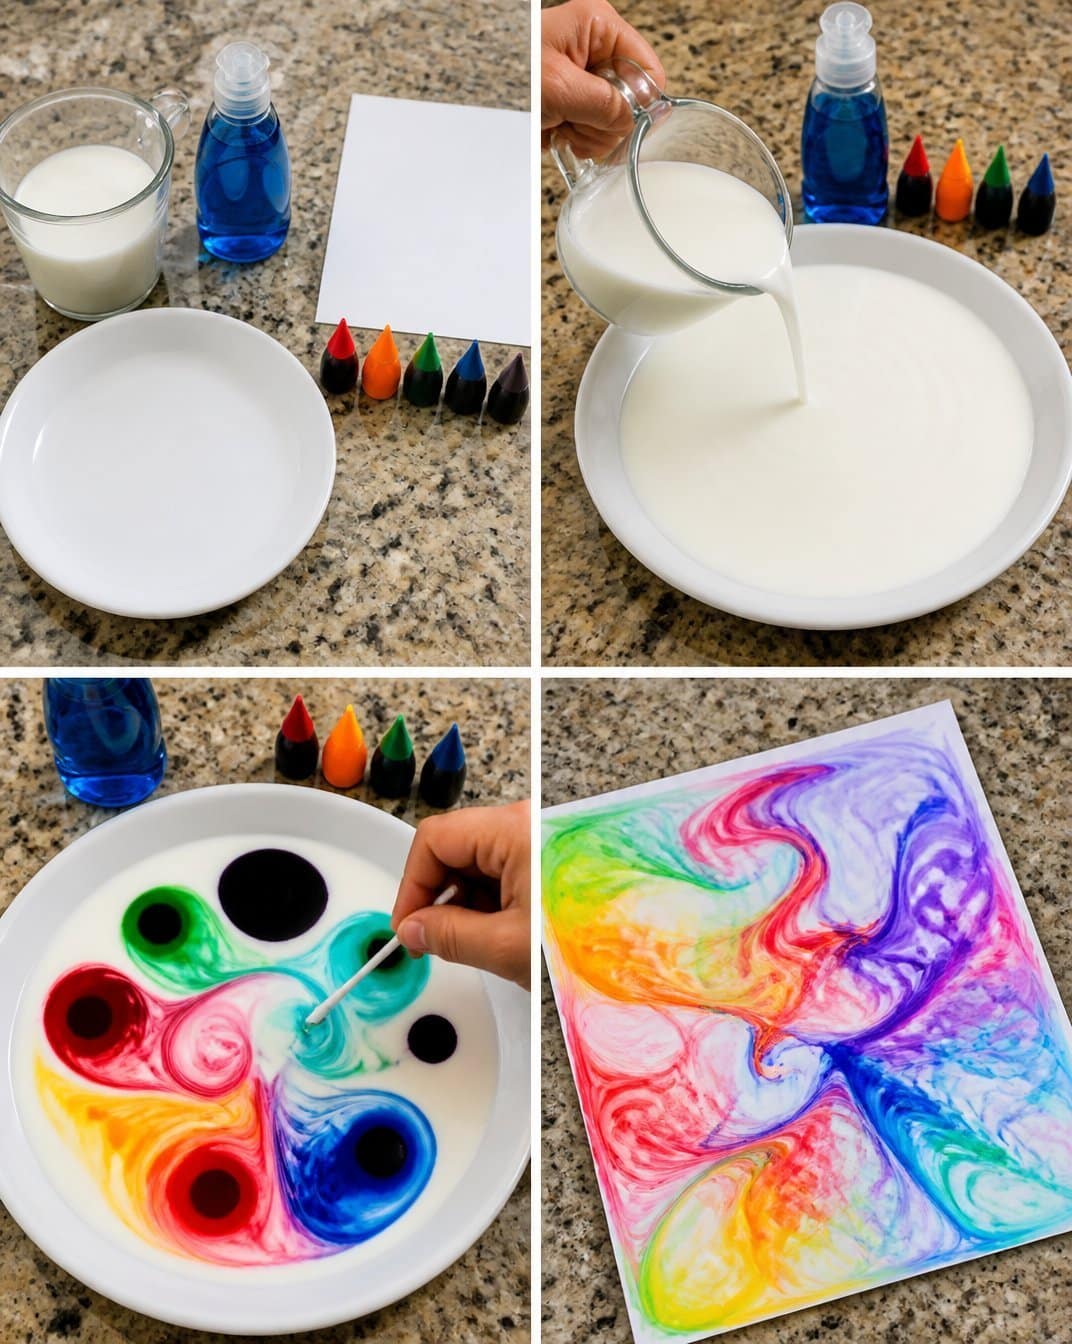
- Experiment with different amounts of food coloring for varied intensity. More drops create bolder swirls.
- Make sure not to overly agitate the milk when applying soap; gentle contact is key to good swirl patterns.
- Allow sufficient time for the resulting prints to dry flat to prevent warping.
- While transferring to paper, ensure to allow contact with the milk for a few seconds to soak up enough color.
Common Mistakes to Avoid
- If the colors do not swirl nicely, it may be due to the soap being applied too vigorously. Try lowering the pressure and gently touching the swab to the milk.
- Using low-fat or skim milk can result in less vibrant colors, so always opt for whole milk.
- If the paper tears during the transfer, a thicker paper would be better suited for the process.
Creative Variations
Feel free to personalize your Magical Rainbow Milk Swirl Print with creative variations:
- Use a mixture of different milk types to see how they affect the swirling results.
- Add a sprinkle of glitter onto the wet prints for a sparkly finish once dried.
- Experiment with additional colors or create themed prints for different holidays.
- Try using cardstock that has a glossy finish for a different texture and sheen.
How to Store Magical Rainbow Milk Swirl Print
To keep your prints looking great, consider these storage tips:
- If storing, place your prints between sheets of parchment paper to avoid sticking and smudging.
- Keep them in a flat, dry place, ideally in a folder to prevent bending.
- Display them away from direct sunlight to avoid fading of colors over time.
A Quick Safety Note
While this project is generally safe, it’s advisable to supervise younger children when handling food coloring and dish soap. Remind them not to ingest any materials used in the process, as they are not food items.
FAQs About Magical Rainbow Milk Swirl Print
How long does it take?
The project takes about 30-45 minutes from setup to finish, but drying time may vary depending on humidity and paper type.
How long does it need to dry?
Typically, the prints take about 1-2 hours to dry completely. Be sure to check that they are thoroughly dry before storing.
Can I use a different material?
You can experiment with alternative liquids like cream, which might create different swirling effects!
Can children make it?
Yes, with supervision, children can actively participate in this fun craft, learning about color mixing as they create.
Conclusion
The Magical Rainbow Milk Swirl Print is not only a captivating project but also a fantastic way to explore creativity and color chemistry. As you engage in this delightful activity, you will find fulfillment in the process and the enchanting results. The joy of sharing homemade crafts can be doubled by involving children or friends in the fun. For more exciting science projects, consider exploring the Magic Milk Experiment For Kids, which uses similar techniques, or learn more about the colorful explosion featured in the Magic Milk Science Experiment. Happy crafting!
Follow us on social for more recipe ideas & inspiration!
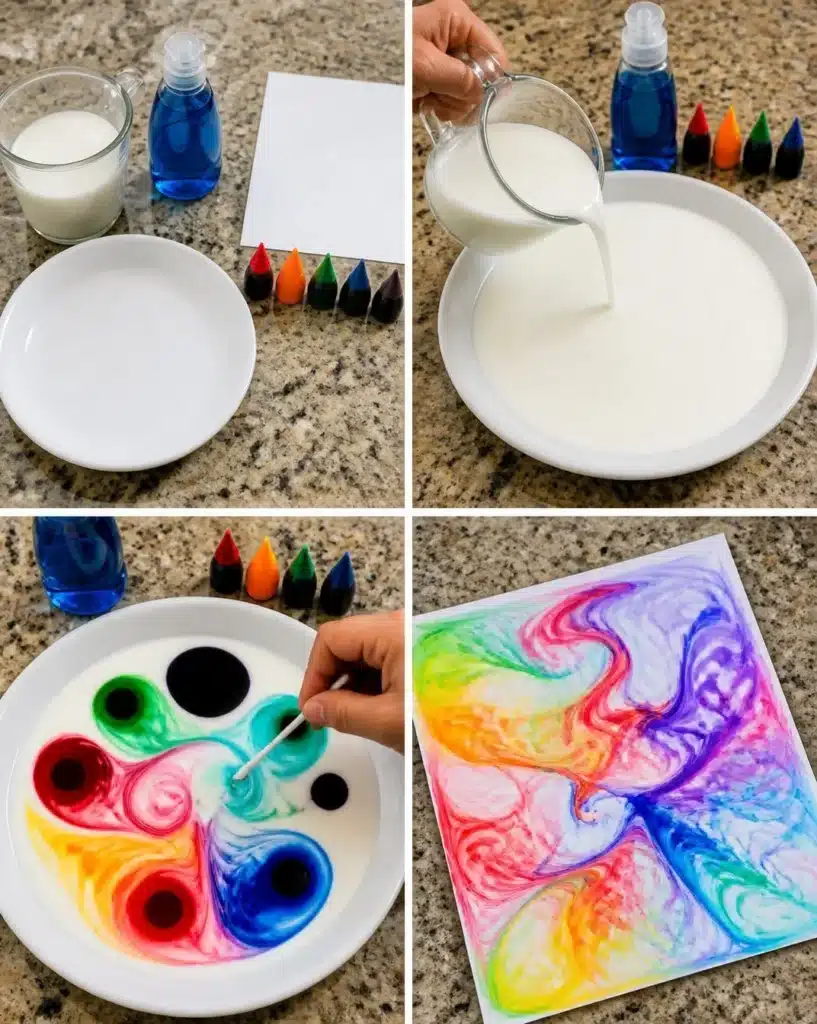
Magical Rainbow Milk Swirl Print
Would you like to save this recipe?
By submitting you agree to receive this recipe and occasional emails. Unsubscribe anytime.
Ingredients
Main ingredients
- 1 cup milk Use whole milk or higher-fat milk for better results.
- various colors food coloring Different colors for vibrant effects.
- 1 drop dish soap Used for swirling effect.
- 1 sheet paper Any plain type, thicker paper recommended.
Helpful tools
- 1 item shallow dish Like a pie plate.
- 1 item cotton swabs Alternatively, use toothpicks.
- 1 item dropper or small spoon For precise coloring.
Instructions
Setup
- Cover your workspace with newspaper or an old cloth to catch spills.
Pouring milk
- Pour the milk into a shallow dish, making sure the bottom is entirely covered.
Adding color
- Add several drops of food coloring in different spots across the surface of the milk.
Creating swirls
- Dip a cotton swab into a small amount of dish soap.
- Gently touch the soapy cotton swab to the center of the color drops to create swirls.
Transferring prints
- Carefully lay a piece of paper on the surface of the milk to transfer designs.
- Lift the paper and set it aside to dry.
Last Step: Don’t forget to leave a rating and comment below! It helps other readers find the best recipes — and it helps us too!
Tips & Notes:
Nutrition Information: Serving: 1 | Calories: | Carbohydrates: | Protein: | Fat: | Sodium: | Fiber: | Sugar:
Nutritional information is provided as a courtesy and calculated automatically. Values can vary depending on the brands and ingredients you use, so if you’re tracking closely, I recommend calculating with your own preferred tool.