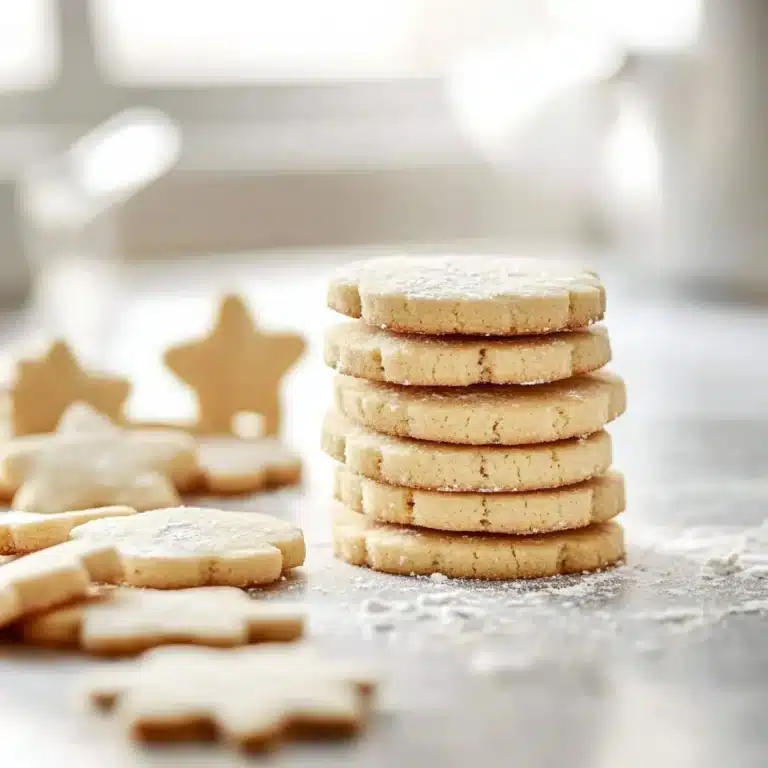
Be warned, these Sugar Cookie Cups disappear fast and leave very happy crumbs behind. Picture butter melting on the counter, sugar crystals catching the light, and a warm vanilla scent that makes the whole kitchen hug you. I still remember pulling the first tray from the oven and watching my niece’s eyes grow wide as if I’d handed her a tiny, edible crown.
I like to think of these as the cookie version of a hug. They are playful, buttery, and small enough to convince yourself that one is just a taste. If you love buttery, soft cookies that hold a fluffy pocket of frosting, you will adore these. And if you want another idea for a soft, comforting cookie, try my take on chewy brown sugar cookies for when you need something a touch deeper and molasses-kissed.
Why You’ll Love This Sugar Cookie Cups
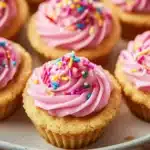
These Sugar Cookie Cups are the tiny festival of treats everyone asks for again. They are perfect at family dinners, school bake sales, cookie exchanges, and those random Tuesday afternoons when the house needs cheering up. The cups are soft at the base with slightly crisp edges, and each one cradles a cloud of cream cheese buttercream like a little pillow.
They do something nice to memories. One baking day becomes the standard: you, the mixer, and a chorus of “oohs” from anyone hovering nearby. These are the kind of cookies that get packed into lunchboxes and show up at potlucks. Their compact size makes them a great hand-held dessert for gatherings where people move and mingle.
Family kitchen secret: these hold decorations well, so you can make them festive for holidays or quiet for a cozy night in. If you want a different kind of holiday sugar rush, I also enjoy experimenting with a Christmas sugar cookies Crumbl copycat style when color and texture take center stage.

How to Make Sugar Cookie Cups
“If your kitchen smells like butter and brown sugar, you’re doing it right.”
Let’s walk through how this dessert comes together. First you’ll cream butter and sugar until the mixture is light and fluffy. The dough will go from grainy to smooth, and you’ll notice a gentle vanilla perfume filling the air. Then the dry ingredients go in, and the dough will feel pillowy but firm enough to shape.
Once pressed into muffin tins, the dough spreads and forms a perfect little crater. The baking fills your home with that classic warm-sweet scent. After cooling, you press the center to carve out a cup. Then comes the fun part: a soft, tangy cream cheese buttercream that pipes into each cookie like frosting for a tiny tart. Expect light frosting peaks and a sprinkle confetti finish if you like.
The Sweet Line-Up
- 3/4 cup salted butter (softened)
- 3/4 cup granulated sugar
- 1 large egg
- 1 1/2 teaspoons vanilla extract
- 1/2 teaspoon almond extract
- 2 cups all-purpose flour
- 1 teaspoon baking powder
- 1/2 teaspoon baking soda
- sprinkles
- 2 ounces cream cheese (softened )
- 3 cups powdered sugar
- 1/4 cup butter
- 2 tablespoons milk
- 1/4 teaspoon vanilla extract
- pink or red food coloring gel (optional)
Friendly notes: use real butter for the best flavor. Don’t skip the pinch of salt, it makes the sweet pop. If your butter is too cold, the creaming step takes forever. If it is too soft, the dough can be greasy and flat.
Step-by-Step Directions
-
Preheat oven to 350 degree F.
Grease 2 regular muffin pans with nonstick cooking spray.
Make sure each cup is lightly coated so the cookies release cleanly. -
In a large bowl with an electric mixer or stand mixer, cream together the butter and sugar until light and fluffy for a few minutes.
Be sure to scrape down the sides of the bowl with a rubber spatula.
This step incorporates air for a softer final crumb. -
Add in egg and extracts and beat again until smooth.
The batter will look glossy and smell delightfully vanilla-forward.
Don’t overmix here or you’ll lose the light texture. -
In a medium bowl, whisk together the flour, baking powder and baking soda.
Whisking makes sure the leavening spreads evenly through the flour. -
Add the flour mixture to the wet mixture and mix until dough has formed.
Be sure not to over-mix. We want tender crumbs, not tough dough.
Stop mixing when you see a uniform dough with no streaks of flour. -
Press 2 tablespoons of cookie dough into the bottom of the cupcake pan and press half way up the sides with your fingers.
Work gently and keep the thickness even so the cups bake uniformly.
If your hands stick, lightly dust them with flour. -
Bake cookie cups for 12 minutes and then let cool for at least 15 minutes.
Press the back of a tablespoon or the top of a round spice jar down the center to form the cup shape. Let cool completely.
If the edges puff, a gentle press after baking still works once the cookies are warm. -
In the meantime, in a medium bowl beat together the cream cheese and butter with an electric hand mixer or stand mixer until smooth.
Add in powdered sugar, vanilla extract and milk. Continue to mix together, then add food coloring gel (optional) until desired frosting consistency is achieved.
Add more milk if it is too thick and more powdered sugar if it is too thin. The frosting should be able to form stiff peaks. -
Add frosting to a piping bag with a star tip and swirl into each cookie cup.
You could also add the frosting in with a spoon. Top with sprinkles (optional). Enjoy!
Chill briefly if you like a firmer frosting, or leave at room temperature for a soft, pillowy bite.
Mini tips tucked into the steps: if a cup bakes with a big dome, don’t panic. Press the center to create the cup while warm and it will settle. If the dough seems sticky when pressing into the pan, refrigerate it for 10 to 15 minutes. When piping frosting, hold the bag straight up and squeeze with a steady hand for pretty swirls.
Serving Sugar Cookie Cups With Love
Serve these warm from the oven with a small scoop of vanilla ice cream on the side. The contrast of warm cookie and cold ice cream makes a smile appear instantly. They are tiny, so people can try the frosting without committing to a huge slice. Place them on a pretty plate, scatter a few extra sprinkles, and watch the room fill with happy noises.
They shine on holiday dessert tables and in lunchboxes. For a cozy family night, bring them to the table and let everyone pick their color of frosting. Kids love being frosting artists, and adults love stealing extra sprinkles when no one is looking.
Pair a plate of Sugar Cookie Cups with tea, coffee, or a rich hot chocolate when you want to slow down and savor the moment. They are crowd-pleasers that make guests feel welcome and warm.

How to Store and Enjoy Later
If you plan to eat them within a day, keep the cookie cups in an airtight container at room temperature. Lay a sheet of parchment between layers so the frosting does not stick. They will stay nicely soft for about 24 hours this way.
For longer storage, refrigerate in an airtight container. They will keep well for 3 to 4 days. Bring them to room temperature before serving so the cookie softens and the frosting loses that chilled stiffness.
You can also freeze the baked cookie cups without frosting. Freeze them in a single layer on a baking sheet until solid, then transfer to a freezer bag. Thaw at room temperature and pipe fresh frosting when ready. This is a great trick if you want to prepare cookie shells ahead of holiday baking.
Avoid freezing the frosting-filled cups; the texture often changes and gets slightly grainy. Instead, freeze the cups plain and fill them on the day you plan to serve.
Tips, Tricks, and Sweet Secrets
- Use room temperature ingredients. Butter and egg at room temp bind better and give a smoother dough. If your fridge is cold, lay the butter out for 30 minutes.
- Don’t overmix the dough after you add the flour. Mix until just combined. Overmixing activates gluten and makes cookies tough.
- For a deeper vanilla flavor, use a vanilla bean paste or a good quality extract. A little goes a long way.
- Want crisp edges and chewy centers? Bake on the middle rack and rotate the pans halfway. That helps even browning.
- If you love a slightly tangy frosting, swap half the cream cheese with mascarpone. It keeps the frosting light and adds subtle richness.
One of my small, proud confessions: sometimes I add a tiny teaspoon of almond extract because it makes the cookies smell like my grandmother’s kitchen. Almond extract is strong, so don’t overdo it.
If you feel adventurous, try pairing these cups with a richer element like a spoon of salted caramel. Or crumble leftovers over a scoop of vanilla ice cream. A little creativity turns them into a new dessert quickly.
For more ideas to spin your cookie creations into mini treats, I like to look at how other small dessert cups behave, like these cookie butter cheesecake cups which show how a creamy center can transform tiny baked shells.
Delicious Variations
These Sugar Cookie Cups are a perfect canvas for seasonal and flavor changes. Try these ideas to keep baking fresh and fun.
- Holiday Stars: Tint the frosting with red and green gels and top with festive sprinkles. Add a pinch of finely grated lemon zest for brightness.
- Berry Bright: Add a teaspoon of lemon zest to the frosting and top each cup with a small spoonful of fresh berry jam. A fresh raspberry makes a lovely crown.
- Nutty Twist: Fold some finely chopped toasted pecans into the dough before pressing into pans. It adds a gentle crunch that plays nicely with the soft frosting.
- Warm Spice: In fall, swap 1/2 teaspoon of the vanilla for pumpkin pie spice for that cozy autumn vibe. This is perfect with a caramel drizzle.
- Chocolate-Lover’s Version: Add 2 tablespoons of cocoa powder to the dry mix for chocolate cookie cups. Fill with a mocha buttercream or an espresso-spiked cream cheese filling.
If you want to transform the cups into a holiday candy, try a small spoonful of fruit fudge in the center before piping the frosting. For inspiration on festive transformations and other sugar cookie mashups, try this fun recipe for an easy Christmas sugar cookie fudge as a creative side idea.
No matter the variation, the key is to keep the cookie base tender and the frosting spreadable. Taste as you go and adjust textures by adding a bit more powdered sugar or milk.
FAQs About Sugar Cookie Cups
Q: Can I make the cookie cups ahead of time?
A: Yes. Bake and cool the cookie shells and freeze them plain, or store them in the fridge for up to 3 days. Fill with frosting the day you serve for the best texture.
Q: What if my dough spreads too thin in the muffin pan?
A: Chill the dough for 10 to 15 minutes before pressing into pans. You can also press a bit more dough into each cup to ensure thicker sides.
Q: Can I use salted or unsalted butter?
A: The recipe uses salted butter. If you use unsalted, add a small pinch of salt to the dough for balance.
Q: How do I get fluffy frosting that pipes well?
A: Beat the cream cheese and butter until very smooth before adding powdered sugar. Chill the frosting briefly if it is too soft, or add a little more powdered sugar to thicken.
Q: Can I make these gluten-free?
A: Yes. Use a 1-to-1 gluten-free flour blend that includes xanthan gum. Expect slightly different texture and watch baking time closely.
Linda’s Little Baking Lessons
I have a few small rules I follow on almost every bake, and they make the day more fun and less fussy.
Keep cookies uniform. If each cup has about the same dough amount, they bake evenly. Use a small cookie scoop or a tablespoon to measure.
Name your disasters. If a tray refuses to cooperate, call it a “rustic batch” and move on. Baking should bring joy, not stress.
Let kids help with safe tasks like sprinkling. The frosting stage is a party, and it makes memories when hands get a little sticky.
If you want to experiment long-term, try making a batch with half the sugar to see how you like the balance. It is a small change but surprisingly pleasant.
A Few Troubleshooting Notes
If cookie cups come out too flat: your butter might have been too warm or you over-creamed. Chill the dough for a short time next batch.
If frosting weeps or looks runny: it may be too warm. Chill the frosting for 10 to 15 minutes and then try piping again. If it still runs, beat in a bit more powdered sugar.
If the centers sink: you may have under-baked or over-filled each cup. Try baking for an extra minute or two, or use slightly less dough per cup.
If you’re worried about food coloring bleeding: use gel color sparingly. Gel gives bright hues with less liquid than liquid food coloring.
Final Serving Ideas and Party Tricks
Make a mini dessert bar. Set out a platter of plain cookie cups alongside bowls of different frosting colors, jams, chopped nuts, and sprinkles. Let guests customize.
For a grown-up party, top some with a dab of bourbon caramel or a sprinkle of flaky salt for a lovely contrast.
To transport: pack in a single layer or use a muffin tin with lids. If you stack, place parchment between layers.
For gifting: place a dozen in a pretty box with paper doilies. These small treats feel like a thoughtful, homemade present.

Conclusion
Bake this once and you will be roped into bringing Sugar Cookie Cups to every family gathering, and I promise you will not resent the invitation. They are tiny, comforting, and full of cheerful possibilities. If you like the idea of a cream cheese buttercream and want another version to compare, you can find a lovely variation called Sugar Cookie Cups with Cream Cheese Buttercream Frosting that gives a slightly different spin on the filling. For a classic, time-tested take on holiday cookie cups, check the Holiday Sugar Cookie Cups Recipe – BettyCrocker.com for more ideas and inspiration.
Now tie on an apron, preheat that oven, and let the house fill with butter and sugar. Share a plate, pass a napkin, and store the smiles as well as the leftovers.

Sugar Cookie Cups
Ingredients
Method
- Preheat oven to 350°F (175°C).
- Grease 2 regular muffin pans with nonstick cooking spray.
- In a large bowl with an electric mixer, cream together the butter and sugar until light and fluffy.
- Add in the egg and extracts, beating until smooth.
- In a separate bowl, whisk the flour, baking powder, and baking soda together.
- Gradually mix the dry ingredients into the wet mixture until a dough forms.
- Press 2 tablespoons of cookie dough into the bottom of each muffin cup.
- Bake cookie cups for 12 minutes, then let cool for at least 15 minutes.
- Press the back of a tablespoon into the center of each cookie to form a cup shape.
- In a bowl, beat together the cream cheese and butter until smooth.
- Add in the powdered sugar, vanilla extract, and milk, then mix to achieve desired consistency.
- Pipe the frosting into each cooled cookie cup and top with sprinkles if desired.