
The first light through my kitchen window finds me reaching for a bowl and the quiet ritual of measuring. The smell of cocoa and a hint of vanilla means comfort is coming. I make Heart Shaped Red Velvet Mini Cakes when I want something gentle and joyful at the same time. They feel like a small, warm gift you can share or savor alone.
Why Heart Shaped Red Velvet Mini Cakes Help You Feel Good
These little cakes carry more than flavor. They carry a way to slow down and connect with simple pleasures. My mother Julia used to wrap tiny cakes for neighbors after a long winter. The shape made people smile. The ritual reminded us that food can care for the heart and the home.
Red velvet is soft, tender, and mild on the stomach. The small size means portion control feels natural. You can enjoy sweetness with intention instead of excess. This helps energy feel steady and mood steady too.
From a modern wellness view, choosing whole rituals around food matters as much as the ingredients. Baking with care, sharing with others, and eating slowly all improve digestion and satisfaction. This recipe blends family warmth with practical balance for real life.

How to Make Heart Shaped Red Velvet Mini Cakes
“Healthy food should taste like home that’s the promise I keep with every recipe.”
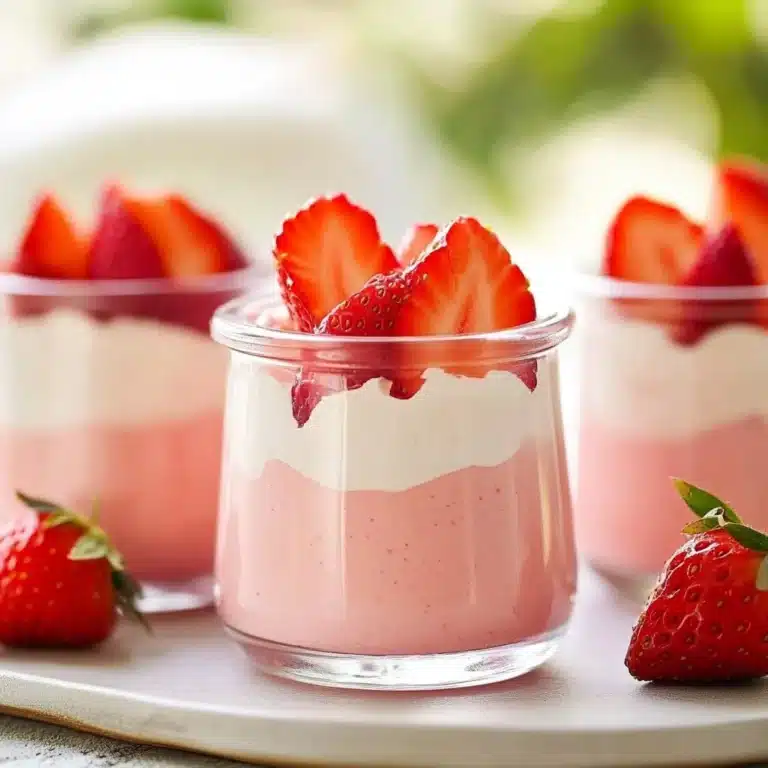
Before the ingredients, picture the colors and textures. The batter is glossy, a soft red that promises velvet crumb. The oven brings a cozy scent of cocoa and warm sugar. The finished cakes are tender and slightly tangy from buttermilk and vinegar. Together they feel comforting and balanced.
A quick overview: you will mix dry and wet ingredients separately, combine gently, fill pans, bake briefly, and finish with a smooth cream cheese frosting. The whole process rewards patience and calm hands.
Ingredients You’ll Need
2 cups all-purpose flour
1 ½ cups granulated sugar
1 cup vegetable oil
1 cup buttermilk, room temperature
2 large eggs, room temperature
2 tablespoons cocoa powder
1 teaspoon baking soda
1 teaspoon vanilla extract
1 teaspoon white vinegar
1 teaspoon salt
Red food coloring (about 1 ounce)
8 ounces cream cheese, softened
1 cup powdered sugar
½ teaspoon vanilla extract (for frosting)
A few caring notes on ingredients. Use real vanilla extract when you can; it lifts flavor gently. If you prefer natural dyes, a small amount of beet powder can add color without changing taste much. Fresh ginger is not in the list, but a small pinch of ground ginger can add warmth and a comforting twist if you like.
Step-by-Step Directions
- Preheat oven to 350°F (175°C) and set an oven rack in the center position.
Make sure the oven is fully heated before you bake. A consistent oven gives even rise.
This step sets the pace for a steady, tender crumb. - Grease heart shaped mini cake pans well.
Use a light brush of oil or a nonstick spray and a dusting of flour if you like.
Greasing carefully helps the cakes release cleanly without tearing. - Sift together flour, cocoa powder, baking soda, and salt in a bowl.
Sifting removes lumps and blends dry flavors evenly.
Take a moment to smell the cocoa; it grounds the batter. - In another bowl, whisk together buttermilk, oil, eggs, vanilla, vinegar, and red food coloring until smooth and glossy.
Whisk gently but thoroughly so the color and liquids unite.
A smooth mixture means a consistent rise and a beautiful crumb. - Gently mix the wet ingredients into the dry until just combined.
Do not overmix, stir slowly and take your time to prevent a dense cake.
This step builds the light, tender texture red velvet is known for. - Divide the batter evenly among the greased pans, filling each about 2/3 full.
Use a small scoop or spoon to keep sizes even for uniform baking.
Even filling helps all cakes finish at the same time. - Bake for 18–20 minutes until a toothpick comes out clean. Cool in pans for 10 minutes, then transfer to a rack.
Watch closely in the last minutes; small cakes can go from done to overbaked quickly.
Once cooled a little, move them gently to cool fully on a rack. - For frosting, beat cream cheese, powdered sugar, and vanilla until smooth. Frost cooled cakes as desired.
Keep the frosting chilled briefly if your kitchen is warm so it spreads easily.
Smooth or piped, the frosting adds that classic tang and balance. - Serve with a light dust of powdered sugar or alongside fresh berries.
Fresh berries add brightness and a touch of natural sweetness.
Take a breath, slice or offer a whole heart, and enjoy slowly.
Hungry for More?
If one recipe is never enough, you’re in the right place. I’ve gathered a cozy mix of our most-loved and up-and-coming dishes over on the Recipe Trends page. Go take a peek you just might find your next family favorite waiting there.
How to Enjoy Heart Shaped Red Velvet Mini Cakes
These mini cakes suit many moments. Serve one with a quiet morning tea to invite calm. Pair a cake with coffee after a gentle workout to refuel without heaviness. Bring them to a small gathering to share warmth that feels mindful rather than indulgent.
They work well for family breakfasts when you want something special but not complicated. Children love the heart shape, and making the cakes together creates a memory tied to touch and taste. For an intimate afternoon, plate two with berries and a cloth napkin for a slow, nourishing pause.
You can also use them for small celebrations. A birthday or simple thanks feels more personal with miniature, handmade cakes. Keep portions kind and the ritual gentle to preserve the sense of care.

Keeping Heart Shaped Red Velvet Mini Cakes Fresh
Store cakes in a single layer in an airtight container for up to 2 days at room temperature if your kitchen is cool. If you add cream cheese frosting, refrigerate and use within 4 days for best quality. The frosting will keep the cake moist but needs safe cooling.
To freeze, place cakes on a baking sheet until firm, then wrap each cake in plastic wrap and place in a freezer bag. Freeze up to 2 months. Thaw overnight in the refrigerator and bring to room temperature before serving so texture returns.
When reheating, warm gently in a low oven for 5 to 8 minutes to revive softness. Avoid the microwave if possible to prevent toughening. Mindful storage reduces waste and keeps the joy of baking sustainable.
Smart Swaps and Variations
Dairy-free option. Replace buttermilk with almond milk plus a teaspoon of white vinegar, and use a dairy-free cream cheese alternative for frosting. This keeps the tang and texture with plant-based choices.
Lower-sugar version. Cut granulated sugar to 1 cup and use powdered sugar sparingly in frosting or swap part of it for a blended date sugar. Smaller cakes mean a sweeter taste with less sugar per serving.
Higher-protein version. Add two tablespoons of unflavored protein powder to the dry mix and reduce the flour by the same amount. This adds a mild nutty note and helps balance hunger after eating.
Spice-lifted variation. Add 1/4 teaspoon of ground cinnamon and a pinch of ground ginger to the dry mix. This keeps the spirit of red velvet but speaks to colder days and cozy flavors.
Decorative ideas. Top with cacao nibs, crushed pistachios, or a smear of ricotta mixed with honey for a lighter finish. These small changes give texture and visual delight.
Wellness Notes
Heart Shaped Red Velvet Mini Cakes are a reminder that small treats can support a balanced life. The portion size helps with moderation, which supports steady energy and digestion. Including protein at meals near your treat, such as yogurt or nut butter, helps blood sugar stay even.
Buttermilk adds a slight tang that feels gentle on digestion for many people. Vinegar helps the cake rise and keeps it tender. Using whole and simple ingredients encourages mindful eating, which research shows improves enjoyment and reduces overeating.
Treats can be part of self-care. Baking with intention and sharing with others supports mental well-being. The ritual of mixing, baking, and plating is as nourishing as the food itself.
Find More Recipes That Nourish Your Mornings
If this recipe helped you start the day with balance, you’ll love the others waiting in my kitchen journal. Each one is simple, wholesome, and tested in real life to make busy mornings feel calmer.
👉 Explore More Healthy Breakfast Recipes Here
FAQs About Heart Shaped Red Velvet Mini Cakes
Can I make this the night before?
Yes, it actually tastes better the next day when the flavors have time to blend and mellow. Keep frosted cakes covered in the fridge overnight.
Can I freeze unfrosted cakes?
Yes, wrap unfrosted cakes tightly and freeze for up to 2 months. Thaw in the fridge, then frost when ready to serve.
What if I do not have heart shaped pans?
Use muffin tins or small round pans and still shape them with simple decorations. The feeling of care matters more than the exact form.
Is there a gluten-free option?
Yes, substitute a 1-to-1 gluten-free flour blend and check for texture. You may need a spoonful more liquid if the batter seems thick.
Can I use natural red colorings?
Beet powder or juice can work. Use sparingly and balance with a little extra cocoa if the flavor shifts.
A Warm Closing Note
This recipe is proof that healthy and homey can be the same thing. Little Heart Shaped Red Velvet Mini Cakes are simple to make, easy to share, and kind on the spirit. When you bake, you are practicing care in a small and steady way. Let these cakes be a reminder that food can soothe and sustain, and that making time for simple rituals supports your whole life.
Conclusion
If you want a different take on mini red velvet cakes with extra moisture tips and step photos, I recommend this helpful guide from Super-Moist Mini Red Velvet Cakes – Amycakes Bakes which shows useful tricks for small cakes. For inspiration on shaping and presenting heart themed cakes, this page offers a lovely classic view at Heart Shaped Red Velvet Cake – A Classic Twist.
Thank you for sharing this kitchen moment with me. Take your time, be gentle with the process, and enjoy each bite with presence.

Heart-Shaped Red Velvet Mini Cakes
Ingredients
Method
- Preheat oven to 350°F (175°C) and set an oven rack in the center position.
- Grease heart-shaped mini cake pans well using a light brush of oil or nonstick spray with a dusting of flour.
- Sift together flour, cocoa powder, baking soda, and salt in a bowl.
- In another bowl, whisk together buttermilk, oil, eggs, vanilla, vinegar, and red food coloring until smooth and glossy.
- Gently mix the wet ingredients into the dry until just combined.
- Divide the batter evenly among the greased pans, filling each about 2/3 full.
- Bake for 18–20 minutes until a toothpick comes out clean. Cool in pans for 10 minutes, then transfer to a rack.
- For frosting, beat cream cheese, powdered sugar, and vanilla until smooth. Frost cooled cakes as desired.
- Serve with a light dust of powdered sugar or alongside fresh berries.