
I can still smell them now: warm sugar like late afternoon sunlight, the gentle roast of peanuts drifting from the oven as my grandmother pressed a glossy chocolate kiss into the soft center of each cookie. The first bite was always the best part. The cookie gave softly at the edges and cradled the chocolate like a small, warm secret. Those afternoons taught me how a simple shell of peanut butter and sugar can hold a family’s stories, and how a plate of Classic Peanut Butter Blossoms can pull everyone back to the same kitchen, the same laughter, the same chair by the window.
Why Classic Peanut Butter Blossoms Belongs in Your Kitchen Story

This cookie is more than a list of ingredients. It is a small ritual that tucks family memory into the corner of a napkin. I remember the way my uncle would pretend not to know which one had the extra kiss, and how my sister always saved the first cookie for dad. Classic Peanut Butter Blossoms bring comfort because they are simple, honest, and quick to share.
These cookies travel easily from holiday platters to school bake sales and quiet Wednesday afternoons. They fold into story as naturally as flour folds into batter. The peanut butter gives a rounded, nutty warmth while the kiss of chocolate adds a clean, cool finish. That contrast is where the magic lives, and why we keep making these cookies year after year.
Meanwhile, this recipe connects generations. My grandmother adapted it from a church cookbook. My mother added a dash of milk to make the dough softer. From there, each of us kept a little change that made the cookie our own. If you like small kitchen projects that return a lot of joy, Classic Peanut Butter Blossoms belong in your routine.
I like to point out a few useful reads that pair well with these treats and ideas for cold-weather snacks like frozen bites that my niece adores. You might enjoy this little idea for chilled peanut butter treats I turned to when I want a lighter finish to a big meal: a frozen peanut butter yogurt bite recipe.
How This Recipe Comes Together
“Every time I stir this pot, it smells just like Sunday at home.”
Before we dig into the recipe, let me give you a quick map of what you will see on the counter and in the oven. The dough will look soft and slightly glossy after creaming the sugars and fats together. It takes on a pale, warm beige color from the peanut butter, with a dusting of sugar that catches the light like tiny flecks.
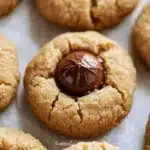
When balls of dough hit the 375°F oven, their edges will firm first while the centers keep a gentle give. That contrast of crackly edge and tender middle is the signature texture. Once you press a milk chocolate kiss into the center while still warm, the chocolate softens but keeps its shape, creating that classic blossom look. Watch for golden edges, and remove when the cookies feel set but still soft to touch.
From there, allow them to cool. The chocolate sets but stays slightly yielding under your thumb, perfect for sharing. If you are looking for another salty-sweet spin for gatherings, try these crunchy sweet-salty bites that pair beautifully with a glass of milk: a peanut butter pretzel cookie idea.
Classic Peanut Butter Blossoms
Ingredients
Method
- In a medium bowl, whisk together the all-purpose flour, baking soda, and salt. Set aside.
- Using a hand mixer or stand mixer, cream together the peanut butter, unsalted butter, granulated sugar, and light brown sugar on medium-high speed until well blended. Scrape the bowl to mix evenly.
- Add in the egg, milk, and vanilla extract. Mix until the batter looks smooth and glossy.
- Reduce mixer speed and gradually add in the dry mixture until completely blended. Fold until no streaks of flour remain.
- Chill the cookie dough for a minimum of 1 hour in a sealed container or covered mixing bowl.
- Preheat the oven to 375°F and line baking sheets with parchment paper.
- Shape the cookie dough into 1 inch balls, roll in granulated sugar, and place on lined baking sheets about 1 1/2 to 2 inches apart.
- Bake for 7-8 minutes, then remove from oven and press a milk chocolate kiss onto each cookie, pressing down gently.
- Return to the oven and bake for an additional 2 minutes.
- Cool cookies on the baking sheet for 5-10 minutes before transferring to a wire rack.
Nutrition
Notes
Tried this recipe?
Let us know how it was!Ingredients You Will Need
- 1 3/4 cup All-Purpose Flour
- 1 tsp Baking Soda
- 1/2 tsp Salt
- 1/2 cup Creamy Peanut Butter
- 1/2 cup Unsalted Butter (room temperature)
- 1/2 cup Granulated Sugar
- 1/2 cup Light Brown Sugar (lightly packed)
- 1 Large Egg
- 2 tbsp Milk
- 1 tsp Vanilla Extract
- 1/2 cup Granulated Sugar (additional amount for coating cookies)
- 11 oz Bag of Hershey Kisses clearly one per line.
Friendly side notes: use fresh vanilla extract if you can; it lifts the aroma and rounds the flavor. Fresh eggs give a silkier structure to the cookie. If your peanut butter has oil separation, stir it well so the dough mixes evenly. Always measure flour by spooning it into the cup and leveling off for the best texture.
Step-by-Step Directions
- In a medium bowl, whisk together the all-purpose flour, baking soda, and salt. Set aside.
Keep the dry mix light and airy by whisking well. - Using a hand mixer or stand mixer fitted with paddle attachment, cream together the peanut butter, unsalted butter, granulated sugar, and light brown sugar on medium-high speed until well blended.
Stop to scrape the bowl so everything mixes evenly. - Add in the egg, milk, and vanilla extract. Scrape down the sides of the bowl as needed.
Mix until the batter looks smooth and glossy. - Reduce the mixer speed, gradually adding in the dry mixture until completely blended.
Fold until you see no streaks of flour. - Place the cookie dough in a well sealed food container or tightly wrap the top of the mixing bowl with plastic wrap (or alternative) and chill the cookie dough for a minimum of 1 hour.
Chilling firms the dough and deepens the flavor. - After dough has chilled, line 2 baking sheets with parchment paper or silicone mats, adjust the oven rack to the 2nd level mark (just above center), and preheat the oven to 375°F.
Preheat thoroughly so baking is even. - Using a spoon and your clean hands, shape the cookie dough into 1 inch balls, roll in granulated sugar, and place about 1 1/2 – 2 inches apart on lined baking sheets.
Roll lightly; too much pressure flattens them. - Bake for 7-8 minutes, then remove from oven and place a milk chocolate kiss on each cookie, pressing down gently to create the crackly cookie edges.
The edges should be set and lightly golden. - Return to the oven and bake for 2 minutes longer.
This melts the base of the kiss so it adheres. - Cool cookies on baking sheet for 5-10 minutes before transferring to a cooking rack to cool completely.
Let them finish setting for the best texture. - Store cookies in an airtight container with a slice of bread for up to a week.
The bread keeps them soft by releasing a bit of moisture.
Mini-tips while you bake: watch for golden edges and avoid over-baking. If the cookies look pale with firm edges, they are likely done. Stir until glossy when creaming to trap air and create a lighter crumb. If you need to shape quickly, chill the dough a bit longer so the cookies stay round.
Bringing Classic Peanut Butter Blossoms to the Table

Serving these cookies feels like opening a small parcel of warmth. I like to put a simple cloth under the platter and place a few extra kisses in a tiny bowl at the center so people can choose a second treat. They pair perfectly with a tall cold milk glass, a warm cup of tea, or even a simple stovetop coffee.
At family gatherings, we lay them out beside bowls of nuts and sliced apples, providing a mix of textures: crunchy fruit, soft cookie, and glossy chocolate. Kids tend to reach first for the shiniest kiss. Adults pause to remember who always stole one from the baking sheet. The cookies become part of the conversation, not just the dessert.
If you want to add a modern touch, dress a small plate of Classic Peanut Butter Blossoms with a scattering of flaky salt and a sprig of mint for contrast. For a nostalgic setup, wrap a few in wax paper and tie with kitchen twine. Sharing these cookies is a gentle act; it tells people they are welcome and that you made something with them in mind.
Saving Classic Peanut Butter Blossoms for Tomorrow
Cookies like these age gracefully. The peanut butter and sugars continue to meld, and after a day the flavor often tastes more integrated. Store them in an airtight container at room temperature for up to a week. A single slice of bread placed in the container keeps them soft by releasing a little moisture over time.
If you want to freeze extras, place them in a single layer on a baking sheet and freeze until firm. Transfer the frozen cookies to a freezer-safe bag and press out the air. They keep well for up to three months. Thaw at room temperature for 20 to 30 minutes, or warm briefly in a 300°F oven for 5 minutes to bring back the fresh-baked aroma.
When reheating, avoid high heat that may fully melt the chocolate and flatten the cookies. A gentle warm-up refreshes the center while keeping edges pleasantly crisp. Once cooled and reheated, the cookies still offer that tender chew and soft chocolate center that makes them feel restorative the next day.
For pairing ideas that last into the afternoon, I often reach for something icy and light such as chilled peanut butter snacks to balance the richness. A recipe I keep coming back to for a cool, simple treat is this frozen peanut butter snack I serve when company lingers after a big meal: frozen peanut butter yogurt bites.
Dalida’s Little Secrets
- Use room temperature butter and egg for a smoother dough. Cold ingredients fight for space and create denser cookies.
- Swap creamy peanut butter for chunky if you like more texture. The cookies will hold more character and a pleasant chew.
- If the dough feels sticky after chilling, dust your hands with a bit of sugar before rolling to keep the balls neat.
- For a richer chocolate finish, try dark chocolate kisses. They give a slightly bitter balance that makes the peanut butter taste sweeter.
- Timing matters: soften the butter until it yields to your finger but is not greasy. Over-softened butter flattens cookies.
I also suggest checking for oven hot spots by baking a test cookie first. If it spreads unevenly, rotate the sheet halfway through baking. That little practice keeps the batch consistent.
If you like salty sweet, a variation inspired by a crunchy twist pairs wonderfully with these blossoms. I have a go-to recipe with a satisfying crunch I often serve beside coffee during long family conversations: a peanut butter pretzel cookie idea.
Heritage Variations

Families adapt recipes the way we pass down stories: with small edits that reveal personal taste. My grandmother sometimes rolled her dough in coarse sugar to give the cookies a little crunch. My aunt liked to press two kisses side by side for a double-heart look. In our region, some bakers add a teaspoon of molasses to deepen the color and give a faint caramel note.
Across the country, people put their stamp on these cookies in different ways. Some press mint kisses for a cool holiday treat. Others sprinkle crushed toffee over the warm kisses for an extra layer of texture. My cousin swirls in a spoonful of brown butter for an almost caramel aroma. These small shifts keep the core idea soft peanut butter cookie, chocolate center while introducing personal meaning.
If you want to make them gluten-free, replace the all-purpose flour with a 1-to-1 gluten-free flour blend that contains xanthan gum to hold the structure. If you prefer vegan, use a plant-based butter, a flax egg, and a dairy-free chocolate kiss. These changes shift the texture slightly but the heart of the cookie remains familiar and comforting.
FAQs About Classic Peanut Butter Blossoms
Can I use crunchy peanut butter instead of creamy?
Yes. Crunchy peanut butter gives extra texture and a rustic chew. I often do this when I want a more rustic bite.
What if I only have salted butter?
Reduce the added salt by half. Salted butter will add enough seasoning without needing the full half teaspoon.
Can I make the dough ahead and bake later?
Absolutely. You can chill the dough for up to 48 hours before baking. The flavors deepen and the dough firms, which makes shaping easier.
Why did my kisses sink into the cookie entirely?
If you press the kiss too far in or leave it in during the long second bake, it may sink. Press just enough to nestle the kiss and watch the extra two minutes carefully.
Do these cookies freeze well?
Yes. Freeze them solid on a sheet, then bag them for up to three months. Thaw at room temperature when ready to enjoy.
A Closing Note
There is a tenderness to recipes that have traveled through hands and over years. Classic Peanut Butter Blossoms are one such recipe. They ask little from you, but they give a great deal back: warm memories, small celebrations, and the simple joy of sharing. When I bake these, I am thinking of how a cookie shared can change the tone of a day. It is the kind of food that comforts, invites conversation, and quietly holds tradition.
Remember, the best versions of this recipe are the ones you make your own. Try a tiny change and watch the way your family roasts a new story into the crust. Bake, press the kiss, and save the corner seat for the guest who always returns. That small ritual carries more home than any single ingredient could.
Conclusion
If you would like a classic reference to compare techniques and photos, I find Sally’s Baking Classic Peanut Butter Blossoms recipe a helpful companion for times when I want a second opinion on baking times and visuals. For another voice and a slightly different twist on the same classic cookie, this version from Beyond the Butter’s Classic Peanut Butter Blossoms offers a useful perspective and additional tips.
Thank you for baking with these memories in mind.
Let’s Stay Connected on Pinterest
I share more than just recipes. I share everyday wellness ideas, simple kitchen swaps, and the kind of meals that make you feel cared for. Join me on Pinterest and save your favorites to inspire a healthier tomorrow.