
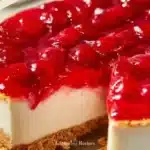
Be warned, this no-bake cheesecake is one of those desserts that magically disappears from the table faster than you can say “sweet tooth.” Imagine a smooth, creamy filling bursting with flavor, all sitting delicately atop a buttery graham cracker crust. Add to that a luscious swirl of your favorite pie filling or whipped cream, and you have the ultimate dessert that brings smiles and warmth to every gathering.
So gather around, my friends, because I am about to take you through a delightful journey of making the finest no-bake cheesecake. This classic treat is more than just a dessert; it’s a family tradition, a celebration of sweet moments, and a way to bond over the joy of baking. So grab your mixing bowl, and let’s get started.
Why You’ll Love This Cheesecake Recipe No Bake
Let’s talk about the magic behind this no-bake cheesecake. For many families, desserts like this are more than just recipes; they are woven into the fabric of our shared memories. Picture a warm summer afternoon when the kids are running about outside, and you’re inside whipping up dessert with laughter echoing in the background.

This cheesecake is perfect for those spontaneous gatherings or just a cozy night in. The beauty of not having to turn on the oven means it won’t heat up your kitchen during those warm months. Whether it’s a birthday, holiday, or simply a Tuesday that needs sweetening, this cheesecake is here for you. Its light and creamy texture will have everyone asking for seconds, while its ease of preparation means you’ll want to make it again and again.
Friends and family alike will find themselves gathering around the table, savoring each creamy bite and sharing stories that bring warmth to the heart. So here’s your excuse to put on your favorite apron and dive into a world filled with sweet delights.
How to Make Cheesecake Recipe No Bake
Making this no-bake cheesecake is more of an experience than just a series of steps. The anticipation builds as you prepare each layer, stirring and mixing ingredients that will ultimately come together to form a decadent dessert.
“If your kitchen smells like butter and brown sugar, you’re doing it right.”
Let’s get into it. Here’s a quick overview of what you need simple ingredients that you probably already have in your pantry. But the real magic happens in the mix of these pantry staples that create a flavor explosion in every bite.
Ingredients You’ll Need
1 1/4 cups graham cracker crumbs
6 tablespoons butter (melted)
16 oz cream cheese (softened, two 8 oz packages)
1/2 cup granulated sugar
2 teaspoons vanilla extract
1 cup heavy cream (cold)
1 cup canned pie filling (cherry, blueberry, or topping of choice)
Now, a few friendly notes to set you up for success: always use real butter for the best flavor it truly makes a difference. Don’t skip the pinch of salt in your sugar mixture; it helps to balance the sweetness and enhances the overall flavor. Let’s go ahead and start creating this beautiful dessert!
Step-by-Step Directions
- Prepare the crust. In a small bowl, combine graham cracker crumbs and melted butter. Stir until the crumbs are moistened. Press this mixture into an 8 or 9-inch glass pie plate. Try to get an even layer. Refrigerate to let it set while you prepare the filling.
- Mix the cream cheese. In a large bowl, cream together the softened cream cheese and granulated sugar. Mix until smooth and well-combined. Be sure to scrape the sides of the bowl to catch any lumps.
- Add the vanilla. Stir in the vanilla extract, allowing the flavors to meld.
- Whip the cream. With your mixer on low, add the cold heavy cream in four increments. Allow it to whip into the cream cheese mixture after each addition, avoiding the urge to rush. Whip for about 1 minute until thick and light. Scrape the sides to ensure even mixing and whip again if needed.
- Combine the filling. Pour the creamy mixture into the prepared pie shell, smoothing the top gently with a spatula. It should be a glorious mound of lusciousness. Cover with plastic wrap and refrigerate for at least 2 hours or up to overnight to firm up.
- Serve it up. Once it’s set, cut into pieces and serve with a generous dollop of your favorite pie filling or whipped cream on top, if desired.
Now that you have your dreamy cheesecake ready, it’s time to gather around with friends and family.
Serving Cheesecake Recipe No Bake With Love
When it comes to serving, remember that presentation is key. This cheesecake can star at your family dinners, holiday celebrations, or even those spontaneous dessert cravings that hit after dinner. Picture it: you slice into the cheesecake, the creamy filling effortlessly gliding onto the plate, while the aromatic toppings transform it into a visual feast.
I love to serve this cheesecake with a choice of toppings. Imagine the pop of a cherry or blueberry pie filling adding a burst of color and flavor. You could even drizzle some chocolate sauce over the top for that extra touch of indulgence.
Once the slices are plated, watch as everyone nests comfortably around the dining table, forks in hand, and laughter flowing freely. This dessert has a remarkable way of bringing everyone together in sweet harmony.

How to Store and Enjoy Later
You might be wondering what to do with the leftovers if there are any. No worries! You can store the cheesecake in the refrigerator for up to a week. Just be sure to keep it covered with plastic wrap to maintain its delightful flavor and texture.
If you think you won’t finish it within the week, you can also freeze the cheesecake! Simply wrap individual slices tightly in plastic wrap and then place them in an airtight container. When you’re ready to enjoy, simply thaw in the refrigerator overnight. There’s nothing like a slice of this creamy delight ready for you to enjoy after a long day.
Tips, Tricks, and Sweet Secrets
- Customize Your Flavors. Have fun with your cream cheese filling. You can add lemon zest for a citrusy twist or a spoonful of cocoa powder for a chocolatey version.
- Add Texture. For a bit of crunch and surprise, toss in some chopped nuts or chocolate chips into the filling. Hazelnuts or walnuts add a warm, cozy texture that pairs beautifully with the creamy filling.
- Top It Off. Instead of pie filling, consider drizzling a warm chocolate ganache or a tangy lemon curd on top perfect for a summer afternoon dessert!
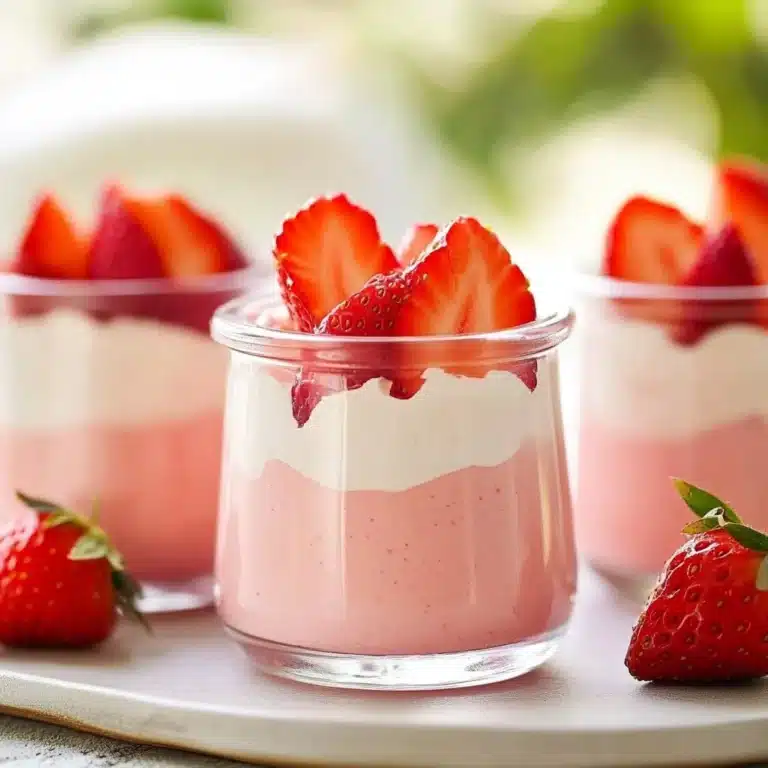
- Layer It. Make mini cheesecakes in jars by layering them with additional toppings and crumbled graham crackers for a look that’s as fun as it is delicious.
- Serve Cold. Remember, the cheesecake is best served cold. It gives that beautifully smooth texture a refreshing element that everyone will love!
Delicious Variations
You can easily customize your no-bake cheesecake to match the seasons or specific celebrations! For instance, in the fall, incorporate pumpkin puree with a hint of pumpkin spice. It’ll become a Thanksgiving favorite!
During spring, try a light, fruity filling mixed with fresh berries to celebrate the season. You can even swap out the classic graham cracker crust for an oatmeal or cookie crust hoisting a whole new dimension of flavor.
Each variation is a delightful twist to enjoy with your family and friends, making this recipe a versatile gem in your baking repertoire.
Hungry for More Sweet Inspiration?
Don’t stop here! I’ve got a whole tray of cozy desserts waiting for you — from gooey cobblers to dreamy crisps and frosted muffins.
No-Bake Cheesecake
Ingredients
Method
- In a small bowl, combine graham cracker crumbs and melted butter. Stir until the crumbs are moistened.
- Press this mixture into an 8 or 9-inch glass pie plate evenly. Refrigerate to let it set while you prepare the filling.
- In a large bowl, cream together softened cream cheese and granulated sugar until smooth and well-combined.
- Stir in the vanilla extract.
- With your mixer on low, add the cold heavy cream in increments, allowing it to whip into the cream cheese mixture until thick and light.
- Pour the creamy mixture into the prepared pie shell, smoothing the top gently.
- Cover with plastic wrap and refrigerate for at least 2 hours or up to overnight to firm up.
- Once set, cut into pieces and serve with a generous dollop of your favorite pie filling or whipped cream on top, if desired.
Nutrition
Notes
Tried this recipe?
Let us know how it was!FAQs About Cheesecake Recipe No Bake
What if I don’t have heavy cream?
You can substitute it with whipped topping for a lighter version, but the results may vary a bit in texture.
Can I make this cheesecake dairy-free?
You can, indeed! Substitute the cream cheese with a dairy-free version and opt for coconut cream in place of heavy cream.
How long does this no-bake cheesecake last?
It can last up to a week in the fridge, but let’s be real, it probably won’t last that long!
Can I use store-bought crust?
Absolutely! For those busy days, a pre-made crust can save time while still offering that delicious cheesecake experience.
What if I don’t have graham crackers?
You can use crushed cookies like Oreo or vanilla wafers for a unique flavor twist just remember to adjust the butter amount slightly.
Until the Next Craving
So there you have it! Your guide to creating a sweet masterpiece that’ll have family and friends reminiscing about cherished moments spent together. Once you’ve baked this delicious cheesecake, I promise you’ll be asked to make it time and time again.
Bake this once, and you’ll be roped into bringing it to every gathering. You’ve been warned! Now go ahead, put on your apron, and enjoy the cozy joy that comes with this cheesecake recipe. Happy baking!
Let’s Talk Desserts on Twitter
Baking is more fun when we share it together. Come join me on Twitter, where I post even more cozy bakes, seasonal treats, and sweet kitchen ideas you can whip up anytime.
👉 Follow Me on Twitter for Daily Dessert Joy