
I still remember the winter my little niece stamped candy cane shapes into the flour while I stirred the batter. The kitchen smelled like warm chocolate, the peppermint from a tin on the counter, and the oven hummed like a lullaby. We baked a pan of Peppermint Bark Brownies that afternoon, and everyone crowded the table. The brownies were glossy on top, tender inside, and crowned with crushed candy that made small, bright cracks when you bit them. That sound became part of the memory, as much as the taste.
If you love rich holiday brownies, you might enjoy another family favorite, frosted Christmas brownies, which I often bring to gatherings and serve beside these bark-topped squares.
Why Peppermint Bark Brownies Belongs in Your Kitchen Story
There is something about chocolate and peppermint together that feels like company. The cool sharpness of peppermint calls out the warm, deep notes of chocolate, and together they make a dessert that feels both festive and familiar. In my family, Peppermint Bark Brownies appeared whenever snow pressed against the windows and the radio played low Christmas tunes.

We make them because they hold hands across the years. The recipe has no need for fuss. It asks only for good chocolate, steady hands, and a willingness to share. When the plate comes to the table, someone remembers a particular winter or a gentle voice, and the food becomes the bridge.
A simple pan of these brownies can turn a slow Sunday into a small celebration. They fit on cookie trays, they travel well to potlucks, and they teach children a small lesson in patience as they wait for the chocolate to firm on top. Meanwhile, the scent fills the house and invites people toward the kitchen.
How This Recipe Comes Together
“Every time I stir this pot, it smells just like Sunday at home.”
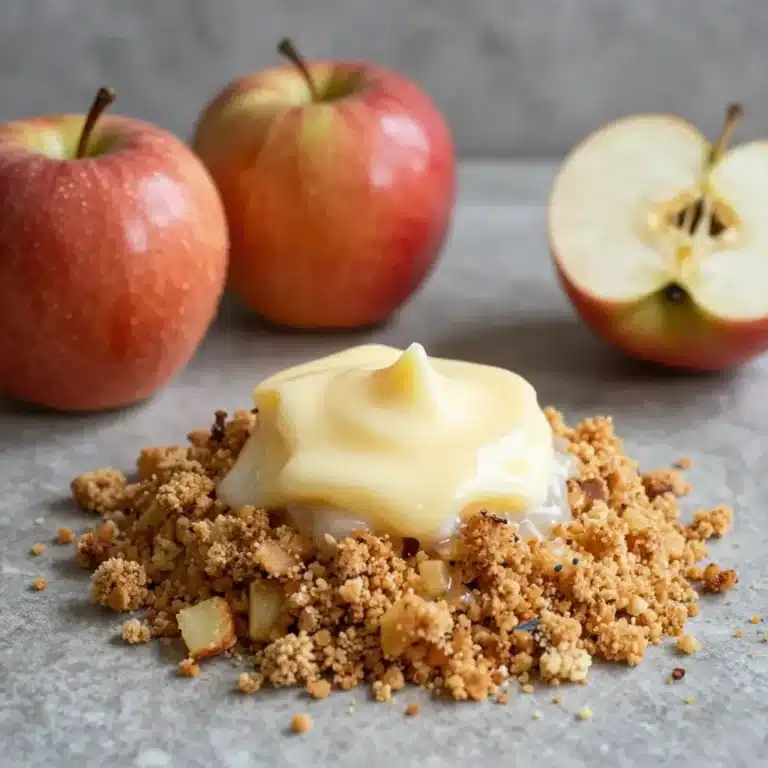
Before you begin, read through the entire flow. The base is a dense, chocolate brownie with a glossy top and a slight chew. From there, a creamy peppermint layer softens the bite and adds a snowy white contrast. Finally, a thin, dark chocolate topping seals the peppermint and cracks under the teeth with bits of crushed candy cane.
Look for color cues: the brownie should be dark and almost shiny at the top. The peppermint layer should be a true white, not yellow, which tells you the butter and cream cheese mixed fully. The final chocolate should sit smooth and harden to a slight sheen. If your chocolate blooms or dulls, it still tastes the same, but the look changes.
If you like to play with contrasts, try a sprinkle of flaky salt on the dark chocolate before it sets. It lifts the flavors and makes the chocolate sing.
For a bright, sunny twist on chocolate intensity, I sometimes refer to my notes when I swap flavors, a small idea I learned while testing other bars like my lemon brownies for summer guests.
Ingredients You Will Need
¾ cup unsalted butter
4 oz dark chocolate (chopped)
½ cup light brown sugar
½ cup granulated sugar
2 large eggs (room temperature)
¼ cup vegetable oil
¾ teaspoon vanilla extract
1 teaspoon kosher salt
¾ cup all purpose flour
¼ cup cocoa powder
3 oz cream cheese (room temperature)
¼ cup unsalted butter (room temperature)
2 ½ cups confectioners’ sugar
½ teaspoon peppermint extract
pinch kosher salt
¼ cup unsalted butter
6 oz dark chocolate (chopped)
3 candy canes (crushed)
Friendly side note: use the best dark chocolate you can afford. A richer bar lifts the whole dessert and keeps the brownie from tasting flat. If you have a small digital scale, weigh the chocolate. It makes the chocolate layer melt and set more predictably.
Another friendly tip: unwrap candy canes and place them in a clean towel before crushing them with a rolling pin. This keeps the pieces from flying and helps you control the size of the shards.
When you stock up for winter desserts, I often pair this with my no-bake Christmas peppermint pie for parties. They echo one another and look lovely together on a dessert table.
Step-by-Step Directions
- Make Brownies
Melt ¾ cup unsalted butter with 4 oz dark chocolate until smooth.
Stir in ½ cup light brown sugar and ½ cup granulated sugar until glossy.
Beat in 2 large eggs, one at a time, then add ¼ cup vegetable oil and ¾ teaspoon vanilla extract.
Fold in 1 teaspoon kosher salt, ¾ cup all purpose flour, and ¼ cup cocoa powder until just combined.
Press batter into a lined 8×8 pan. Bake at 350°F for 22–26 minutes. Watch for golden edges and a slightly soft center. Mini-tip: start checking at 20 minutes; the center should still jiggle a touch. - Make Peppermint Layer
Beat 3 oz cream cheese with ¼ cup unsalted butter (room temperature) until smooth.
Add 2 ½ cups confectioners’ sugar gradually, then ½ teaspoon peppermint extract and a pinch of kosher salt.
Spread this layer over the warm but not hot brownies. The heat helps the peppermint layer set thinly.
Smooth with a spatula and chill for 20–30 minutes. Mini-tip: chill longer if your kitchen is warm so the next layer will not sink. - Make Chocolate Topping
Melt ¼ cup unsalted butter with 6 oz dark chocolate until glossy but not scalding.
Pour over the chilled peppermint layer and spread gently. From there, immediately sprinkle 3 candy canes (crushed) over the top.
Press carefully so the candy adheres, then chill until the chocolate firms, about 30–45 minutes. Mini-tip: if the chocolate loses sheen, give it a quick moment at low heat; it will shine back once tempered by the cold pan.
Once cooled, cut into squares with a sharp knife warmed under hot water and wiped dry. This helps get a clean cut through chocolate and peppermint without tearing the layers. After cutting, let squares rest for a few minutes at room temperature so the brownie softens slightly and the peppermint layer becomes creamy.
Serving Peppermint Bark Brownies With Family Warmth

Place brownies on a simple white plate so they stand out. I like to line a platter with brown paper and scatter a few whole candy canes for color. Serve with strong coffee or warm cocoa. The bitterness of the coffee balances the sweet topping, and the peppermint hangs in the air like a small memory.
At the table, we pass the platter and tell little stories. Someone always remembers who brought the first batch to the holiday or who dropped a tray in a rush once. Those small confessions fill the room with a soft kind of laughter.
For a mixed tray, my guests love the contrast with chocolate chip cookie brownies placed beside the peppermint squares. The differences in texture and aroma make each bite feel new.
Children often prefer the candy cane strewn on top. Adults sometimes break a square and add a spoonful of whipped cream or a sliver of orange zest. The key is to serve with care and let the food be the invitation for conversation.
Keeping the Comfort Alive
Store the brownies in an airtight container at room temperature for up to three days. If your home is warm, keep them in the refrigerator for up to one week. When you refrigerate, take the pan out an hour before serving so the chocolate softens back to a pleasant bite.
If you want to freeze them, wrap individual squares in plastic wrap and place them in a freezer bag. They keep for up to three months. Thaw overnight in the refrigerator and bring to room temperature before serving. The peppermint stays bright and the chocolate returns to a smooth finish.
Flavors deepen with time. After a day, the peppermint layer melds with the brownie and the chocolate top may develop a softer crack. If you prefer crisp contrast, serve within the first day.
Dalida’s Little Secrets
- Temperature matters. Use room temperature eggs and cream cheese. It keeps the batter smooth and prevents the peppermint layer from becoming grainy.
- Choose chocolate with 60–70 percent cacao for a rich flavor that balances sugar. Lower percent chocolate can make the top too sweet.
- Crush candy canes to a variety of sizes. Tiny dust gives color and a hint of peppermint. Larger shards give a delightful crunch and a burst of flavor.
- Use a non-stick or lined pan to lift the brownies cleanly. Parchment paper with an overhang makes removal easy and keeps edges neat.
- If you need to speed things, use a microwave to melt chocolate in 20-second bursts. Stir between bursts until smooth. Watch closely to avoid browning the chocolate.
These small changes make a big difference in texture and appearance. Over the years, I learned to read the pan and the brownies. A slight gloss on the top means they are not overbaked. If the center pulls away from the sides, they are ready.
Heritage Variations
My grandmother sprinkled toasted almonds on top in some winters and called it a nod to her homeland where nuts were a sign of good luck. Other families in my town swap dark chocolate for milk chocolate for a softer, sweeter bite. In the South, a dash of cinnamon in the batter finds its way into many holiday trays.
In a small mountain town where I once lived, people added a smear of raspberry jam between the brownie and peppermint layer for a tart surprise. It sounds fancy but it felt like home because it was made with late-summer jam and old jars. In another home, neighbors folded crushed peppermint into the brownie batter itself, making the chocolate flecked with white.
These changes show how recipes travel and change. Each family gives the dish a small signature: a change in nuts, a splash of extract, a different chocolate. It is proof that food is a living story.

FAQs About Peppermint Bark Brownies
Can I use salted butter?
Yes. Many people do. Reduce the added kosher salt to a pinch if you use salted butter so the brownies do not turn overly salty.
Can I skip the cream cheese in the peppermint layer?
Yes. Skipping it makes a simpler buttercream. Use ½ cup unsalted butter and 2 ½ cups confectioners’ sugar with ½ teaspoon peppermint extract. The cream cheese adds tang and a silkier mouthfeel.
Can I make the brownies gluten-free?
Yes, replace the all purpose flour with a 1:1 gluten-free blend. Watch baking time closely; some blends bake faster or slower.
Will the candy cane color bleed into the chocolate?
Little bits of candy dust can make a faint haze if sprinkled while the chocolate is very hot. Wait until the chocolate is warm and flowy, not steaming, to get the brightest white and red contrast.
How do I get a clean slice through the layers?
Warm the knife under hot water, wipe it dry, and then cut. Repeat between slices for neat edges.
A Final Thought
We bake to hold time, to anchor moments into flavor. Peppermint Bark Brownies do more than feed a crowd. They gather hands, spin stories, and build new memories on old ones. When a child bites a corner and smiles at the crackling of candy, you can almost hear your own past spoken back to you.
Carry this recipe forward. Let someone stir the bowl next time. Let them hear your story as the chocolate melts and let the kitchen become a small classroom of love and tradition. Food carries the voice of family, and with these brownies you give a small, bright memory that lasts.
Conclusion
If you would like to compare other beloved takes on this idea, I often read about different techniques from trusted sites like Broma Bakery’s Peppermint Bark Brownies for visual ideas and presentation tips. For a child-friendly version and approachable instructions, I also refer friends to On My Kids Plate’s Peppermint Bark Brownies which offers helpful notes for family baking.
Peppermint Bark Brownies
Ingredients
Method
- Melt ¾ cup unsalted butter with 4 oz dark chocolate until smooth.
- Stir in ½ cup light brown sugar and ½ cup granulated sugar until glossy.
- Beat in 2 large eggs, one at a time, then add ¼ cup vegetable oil and ¾ teaspoon vanilla extract.
- Fold in 1 teaspoon kosher salt, ¾ cup all purpose flour, and ¼ cup cocoa powder until just combined.
- Press batter into a lined 8×8 pan. Bake at 350°F for 22–26 minutes.
- Beat 3 oz cream cheese with ¼ cup unsalted butter until smooth.
- Add 2 ½ cups confectioners’ sugar gradually, then ½ teaspoon peppermint extract and a pinch of kosher salt.
- Spread the peppermint layer over the warm brownies and chill for 20–30 minutes.
- Melt ¼ cup unsalted butter with 6 oz dark chocolate until glossy.
- Pour over the chilled peppermint layer and spread gently.
- Sprinkle crushed candy canes over the top and press carefully.
- Chill until the chocolate firms, about 30–45 minutes.
- Cut into squares with a sharp knife warmed under hot water.
- Serve on a white plate or platter.
Nutrition
Notes
Tried this recipe?
Let us know how it was!Let’s Stay Connected on Pinterest
I share more than just recipes. I share everyday wellness ideas, simple kitchen swaps, and the kind of meals that make you feel cared for. Join me on Pinterest and save your favorites to inspire a healthier tomorrow.